Document - Excel File
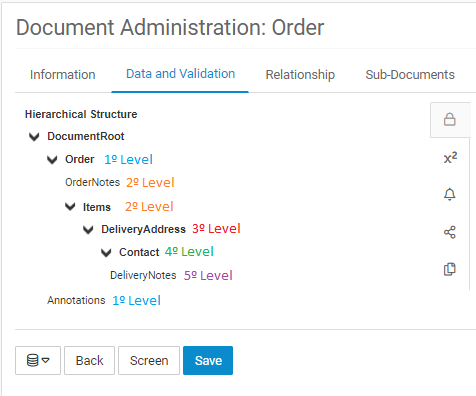
Before you start you must understand the concept of Level from Document hierarchy. The level is nothing more than the position of a structure / information that compose the hierarchy of a Document, this configuration is performed through the tab Data and Validation, the following image demonstrates the configuration of a Document with 5 levels of structure.
Filling the Template
Indexes
Document is a complex structure, can be multilevel and each level can have zero or n elements, depends on the multiplicity configuration selected. To translate this structure to Excel we use the concept of indexes between the file's sheets. Let's take the following structure as a reference:
- Order (ONE) 1º level
-- OrderNotes (ZERO OR MANY) 2º level
-- Items (ZERO OR MANY) 2º level
----- DeliveryAddress (ZERO OR ONE) 3º level
-------- Contacts (ZERO OR MANY) 4º level
----------- DeliveryNotes (ZERO OR MANY) 5º level
- Annotations (ZERO OR MANY) 1º level
Each item at the
Documentstructure has a multiplicity type (ONE,ZERO OR ONE,MANY,ZERO OR MANY) and this affects directly the way the data is filled.
Translating the structure:
Documenthas oneOrder.Orderhas zero or nOrderNotes.Orderhas zero or nItems.- Each
Itemhas zero or oneDelivery Address. - Each
Delivery Addresshas zero or nContacts. - Each
Contacthas zero or nDelivery Notes. Documenthas zero or nAnnotations.
Sheet _Document_
All starts in the _Document_ sheet, it has 4 columns and is responsible for determining how many documents will be imported.
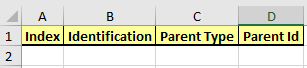
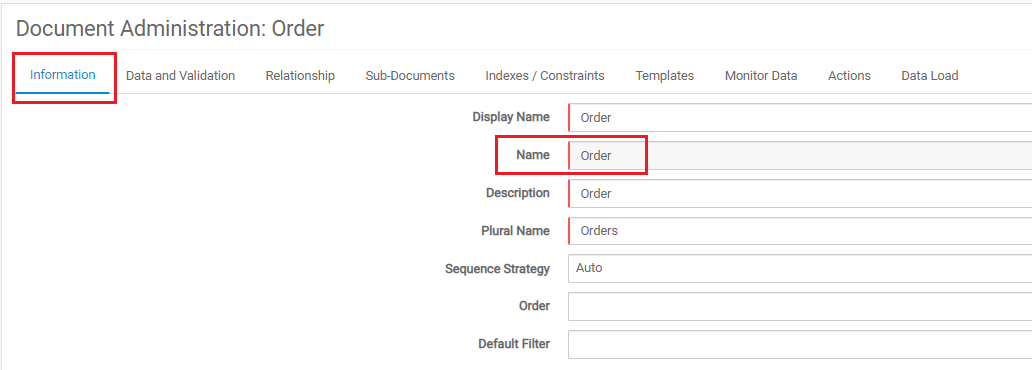
Index: Random index that identifies theDocumentin the file. It can be composed of numbers or letters, usually the use of numbers is made.Identification: Is theIDof theDocument, can be filled or not. If it is filled, it will be searched for aDocumentwith theID, if found, thisDocumentwill be updated, if not found, a newDocumentwill be created using the informedID. If not filled, a newDocumentwith system-generatedIDis created.ParentType: Used to importSubDocument, you must enter the name of theParent Document, this information can be obtained in the Document'snamefield, as follows:
Parent Id: Is theIDof theParent Document.
Points of attention when importing SubDocument:
- Not found the
Parent Documentdoes not prevent the import of the Document. If necessary the Document can be re-imported with the correct data from Parent, so be sure to fill in theDocumentthe correctIDfor produce an update and not a create operation. - The link between a
SubDocumentand aParent Documentis establish just once.MECEAPdoes not allow to change the link to anotherParent Document. Be careful. - When importing by user this sheet wont have
Parent TypeandParent Idcolumns, it's no necessary because the system already knows the Parent Document.
Other Sheets
The sheets after _Document_ will vary and represent the Document structure respecting the hierarchy defined. In our example the sheets will be defined as follows:

Order Sheet

For all the sheets the first two columns, indicated in yellow, indicate the indexes.
The first column indicates the index of the higher structure data, analyzing the case of Order which is a structure of 1st level, the higher structure is the Document. This is why the column calls Document.Index, this data comes from the_Document_ sheet.
It is worth mentioning that in this column an index value can appear more than once, this because a data can be linked n times to a its higher structure. In the case of Order this statement ist not true because one Document has only one Order, but in the case of Items the reality changes since it is a relation of 1..1 Order -> 0 .. n Items, we'll look at this when we talk about the sheet Items.
The second column is the index value of the sheet, notice the name Order.Index, this value is transferred to the lower level structures, in this case it will be transferred to the Items and OrderNotes sheets. This column can never have a repeating index value, must be unique for each row in the sheet.
Order Notes Sheet

Similar to Item, Order Notes is a 2º level structure, resides bellow Order and has a multiplicity configuration of ZERO OR MANY, this means it's possible to introduce many notes. Pay attention at the image above, notice we define two notes for the same Order, this was possible because we defined both values for the column Order.Index as 1. This means, this information must be linked with the Order with index 1 defined at the Order sheet.
Items Sheet

Very similar to the Order Notes, this is because Items is also under Order and has the same multiplicity configuration type ZERO OR MANY. The difference is that Item has a lower structure,DeliveryAddress, indexes defined on the second column named as Order.Items.Index will be transferred to the sheet DeliveryAddress.
Delivery Address Sheet

Delivery Address is a lower structure of Items and has the multiplicity configuration type ZERO OR ONE. In the example above we defined one delivery address to each item defined previously.
Contacts Sheet

Contacts is a lower structure of Delivery Address and has the multiplicity configuration type ZERO OR MANY. In the example above we defined two Contacts to the first Delivery Address and one to the second one.
Delivery Notes Sheet

Delivery Notes is a lower structure of Contacts and has the multiplicity configuration type ZERO OR MANY. In the example above we defined two Delivery Notes to the first Contact, nothing to the second and one to the third.
Annotations Sheet

Similar to Order, Annotations is a 1st level structure but has the multiplicity configuration type ZERO OR MANY. In the example above we defined two annotations for the Document.
This completes the procedure for filling out a Document for the proposed structure. To fill out new documents, simply follow the same procedure, always starting with the sheet _Document_. Notice that there is a pattern for the name of the first two columns, there will always be an indication of which structure is superior and which structure is being filled. Just check the column name by removing the .Index suffix. It is possible to observe all structure only by correctly interpreting the column name.
Good Practices & Tips
- Although possible, avoid loading many documents unless you are sure that the file does not have any relationship flaws. This alert is done because once the process started it can’t be interrupted by the user, another consideration is that the deletion is done manually in a unitary way, a wrong import can lead to a great rework.
- Always use the generated template that can be downloaded at the Document page. Do not reuse files, there may be inconsistency between fields because each environment can have its specificity.
- If you have doubts about filling the template, register a document and download the template with data by filtering the document that you registered, this may facilitate the understanding of the template since each document has a unique structure.
- Attention when filling numeric fields.
- Attention when filling date / datetime fields:
MECEAP uses the full date format that includes: year, month, day, hour, minute, second, millisecond and timezone, example: 2019-03-22T12:00:00.000-03:00, this is the format when the data is exported.
There are two more ways to fill this type of field:
- Excel cell formatted as Text:
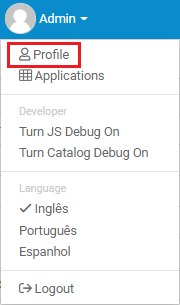
When you format the cell as text, you can fill only dates, that is, you can’t set the time. The formatting of the field must follow the same formatting as the user profile that is loading the file. This configuration is done by clicking on the avatar of the user located in the upper right corner and going to the Profile option.
Once in the user's profile, access the Language & Region tab, Preferences option, Date Format.
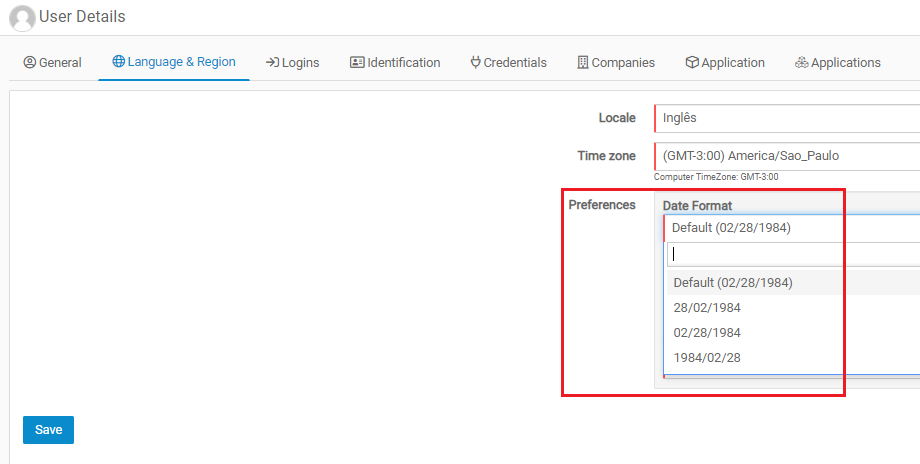
Note in the image above, the formatting follows the month/day/year pattern. So the data in Excel must be as month/day/year. Same logic to other formats, available options: day/month/year, month/day/year, year/month/day.
- Excel cell formatted as Date
Formatting the cell as a date will make it possible to fill date and datetime values. There are several types of formatting in Excel for date-type cells, and any one can be used.
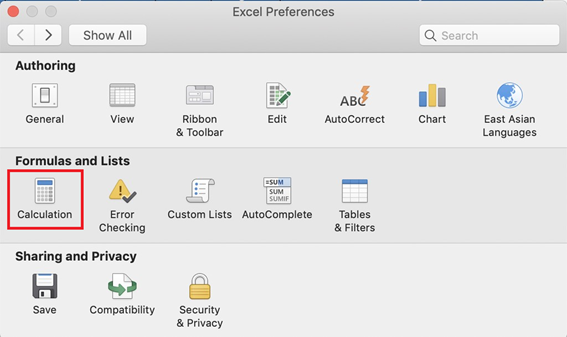
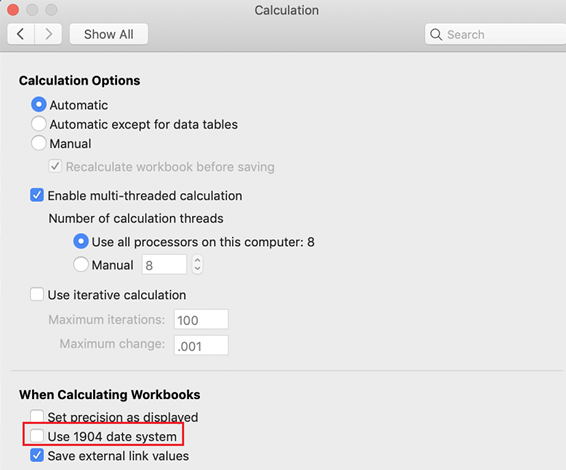
Mac users should pay special attention when using the formatting as date, it is necessary that the worksheet is not configured to use the 1904 date system. To configure, access Excel Preferences and go to Calculation:
Make sure that the "Use 1904 date system" option is unchecked:
More info about 1904 date system here.
Sheet populated with several date types:

-
Green cells are configured as date.
-
Blue cells are configured as text.
-
Orange cells is in the default format exported by
MECEAP.