Human Being - Import Data
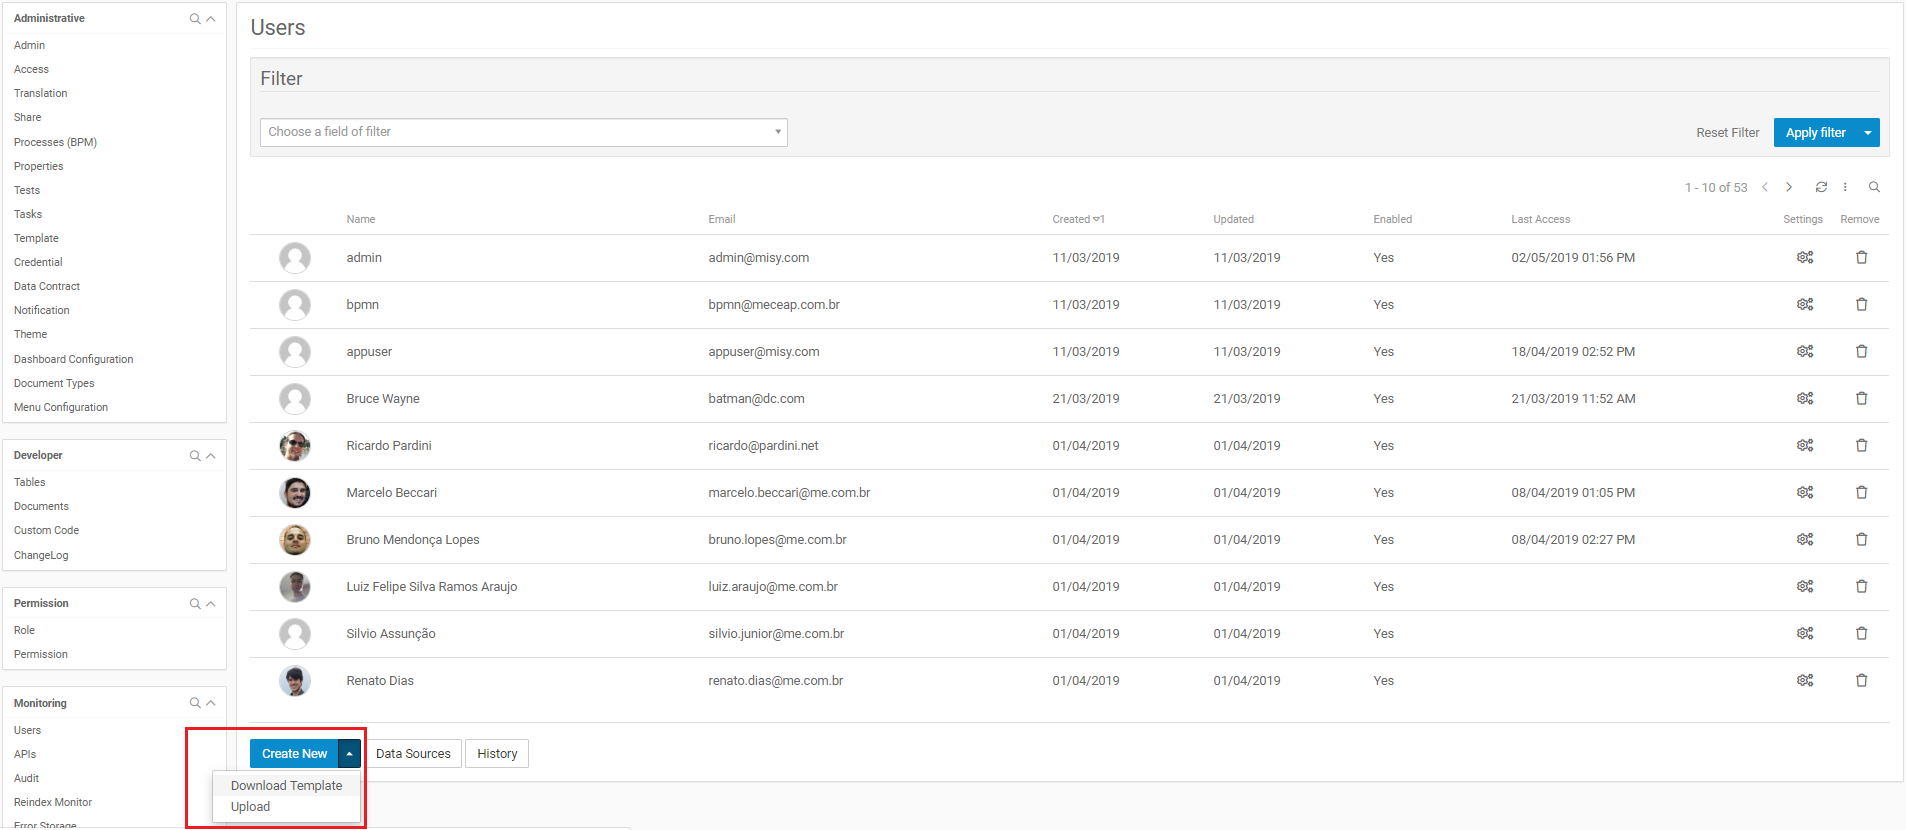
First go to the User's page: Menu Configuration -> Users.
Supported Operations
Download template
Download the template, structure:
User
| Column | Value |
|---|---|
| the user's email | |
| name | the user's name |
| language | the user's language / locale |
| timeZone | the user's timeZone |
Possible values for locale: en, pt, pt_BR, es, en_GB, en_CA.
Expected format for timeZone: America/Sao_Paulo, Europe/Lisbon, etc.
CustomRoot (Application)
| Column | Value |
|---|---|
| the user's email | |
| customRoot | the customRoot's name |
| default | set the customRoot as default (true or false) |
Default: Only if the user does not have another CustomRoot set as default.
Role
| Column | Value |
|---|---|
| the user's email | |
| customRoot | the customRoot's name |
| role | the role's name |
Default: No need to define
ROLE_USERsince all users by default has this role when shared with a CustomRoot.
Group
| Column | Value |
|---|---|
| the user's email | |
| customRoot | the customRoot's name |
| group | the group's name |
Default: Only
Systemgroups are supported.
Download here
Upload
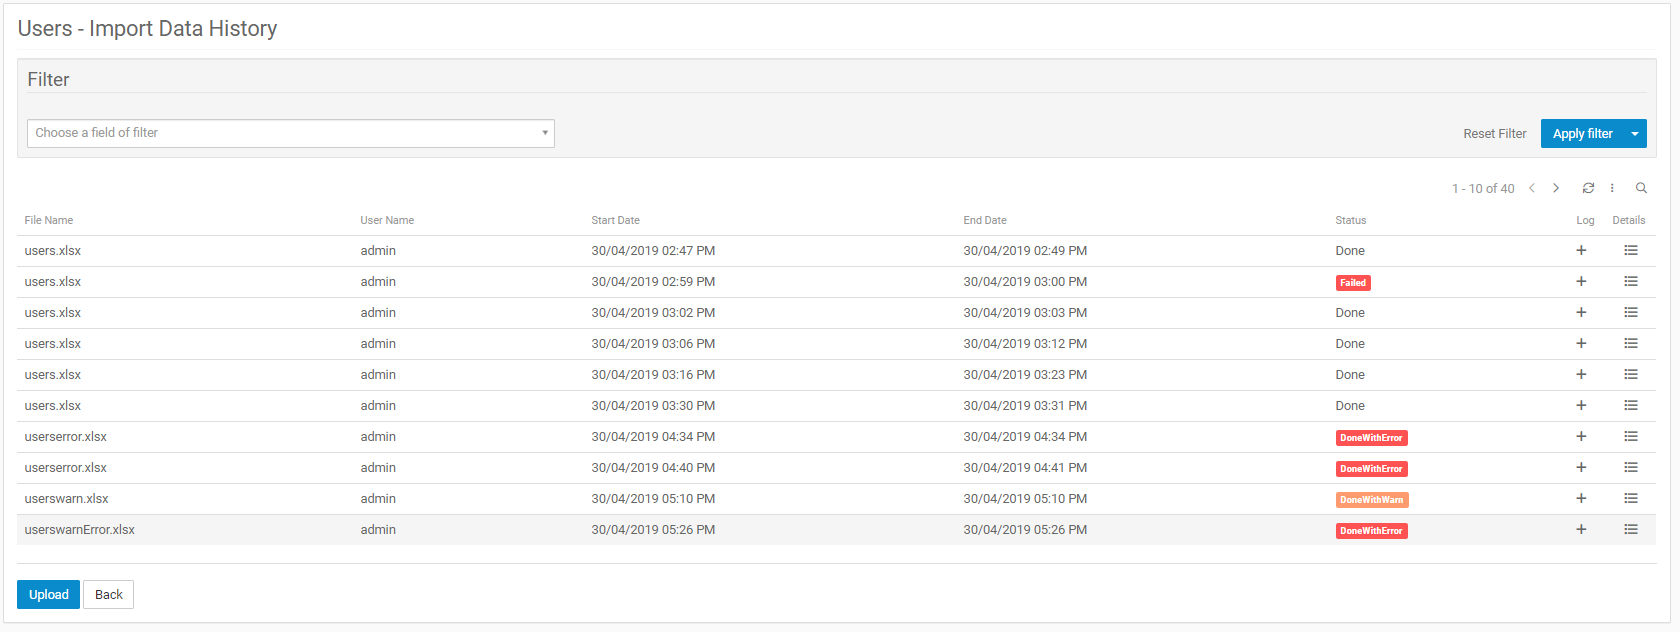
Import History
First you're redirected to a history page with all imports realized. At this page you can take a quick look at the import log for each processing but also have a link to a detailed view.
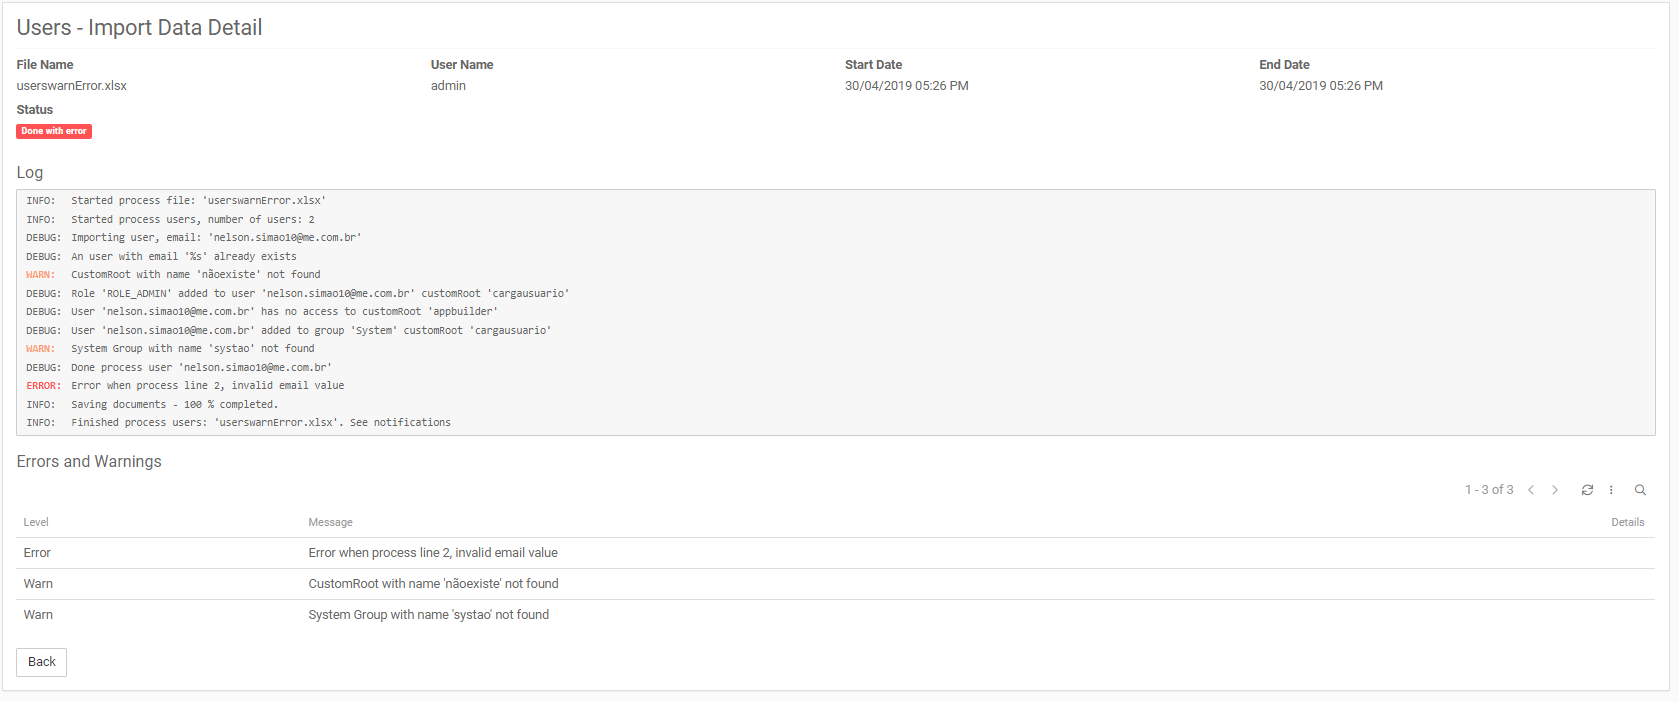
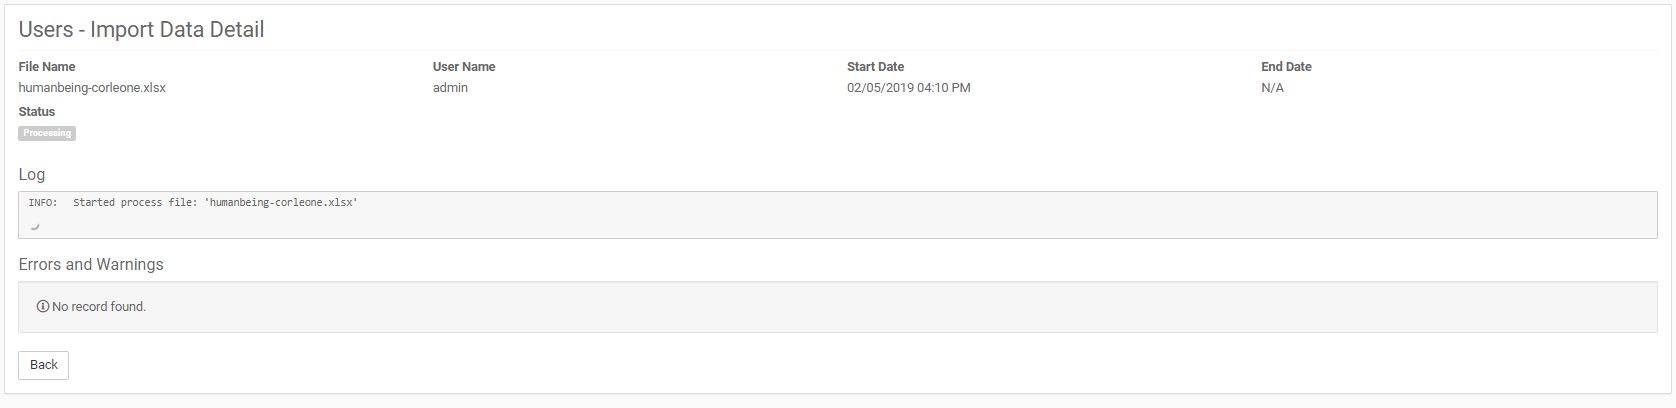
Import Detail
The detail page has all information regarding a single import process. This page is composed of three areas:
- Header: Has basic import information: what, who, when, and status.
- Log: Every import detail, this information is updated in real time when the import is in process.
- Errors and Warnings: The events of filtered errors and warnings, to facilitate the visualization of important information that signal possible problems that may have impacted the quality of the data that was imported, this area deserves full attention of the user responsible for the import.
Starting a new import
Going back to the history page and after fill your excel file, click at the Upload button. This will show a pop-up, select your file and click Upload.
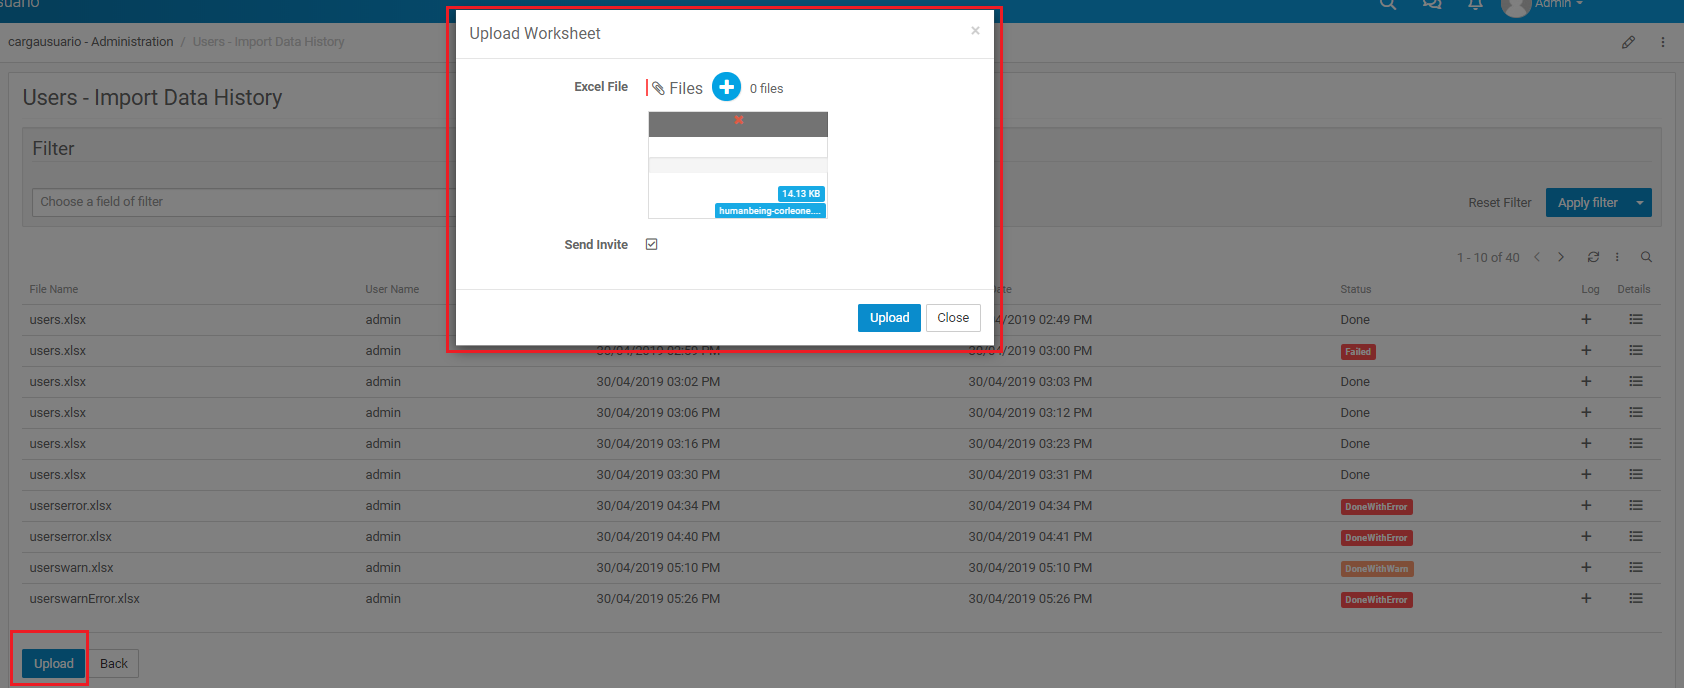
Option
Send Invite: This option sends the e-mail invitation for CEAP access. Note: Even if the option has not been checked first, you can mark it and reprocess the file. This was created to be possible to separate the load and sending of the email at different times. It is worth mentioning that the email is only sent if the user has not yet validated the email.
You will be redirected to the detail page to track the processing of your file.
After process, your upload will have one of these status:
Failed: Some serious error has stopped the process. It will often be generated by an inconsistency in the file.Done with error: Import completed with error, but did not prevent the import of the file. Example: The file has 10 users, only 1 was not imported by some error.Done with warning: Import completed with warning. All users have been imported, but some data may be inconsistent. Example: Invalid system group name.Done: Import completed without any error or warning.
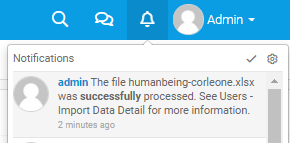
If you want, you can track in real time the import process, but besides that, in the end, you will also receive a notification with the information based on status.