Quick Start
Quick Start for Bpmn Process - App Builder
You can create a simple Process using the Web Modeler and existing Handlers to execute Macros, open documents in specific Screen and evaluate conditions through Screen Actions.
Let's create a simple Approval Process!
Document Type
A Process references a DocumentType, otherwise, every instance of a Process references a Document of a configured Document Type. You cannot have two process instances for the same document.
Let's assume the follow Document Pedido:
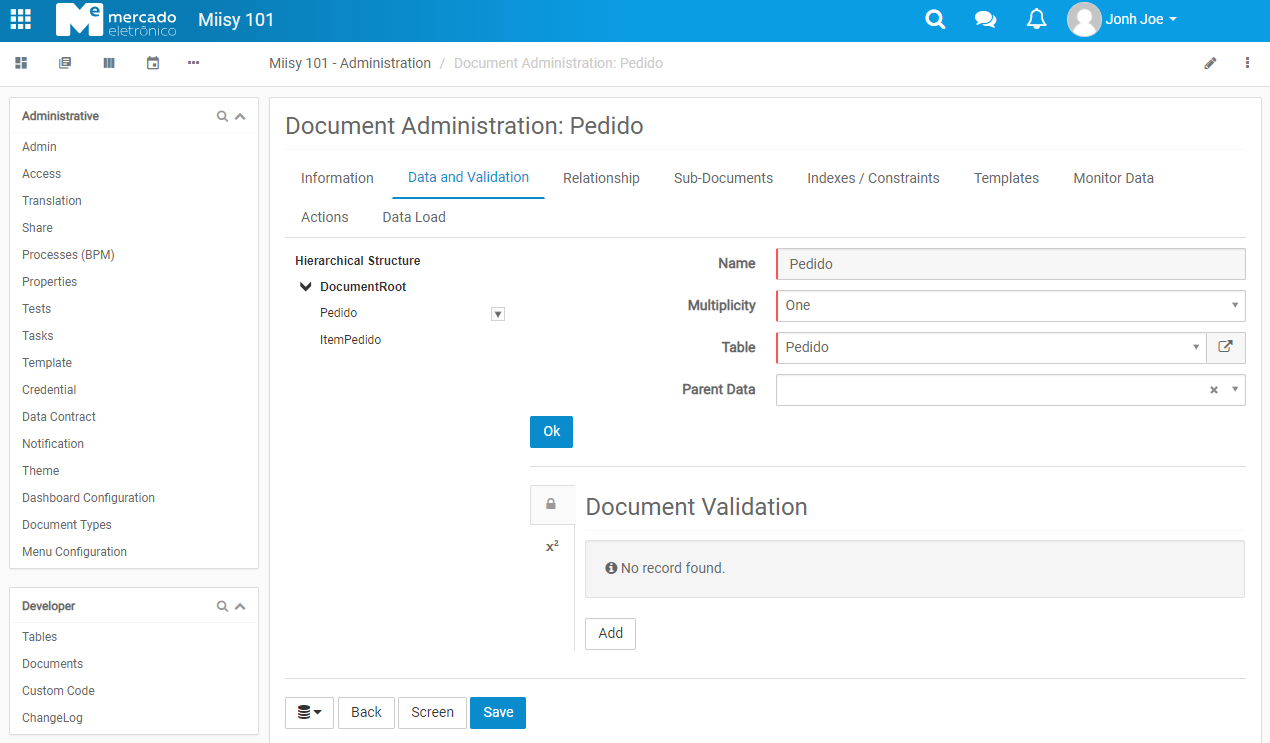
Data Objects
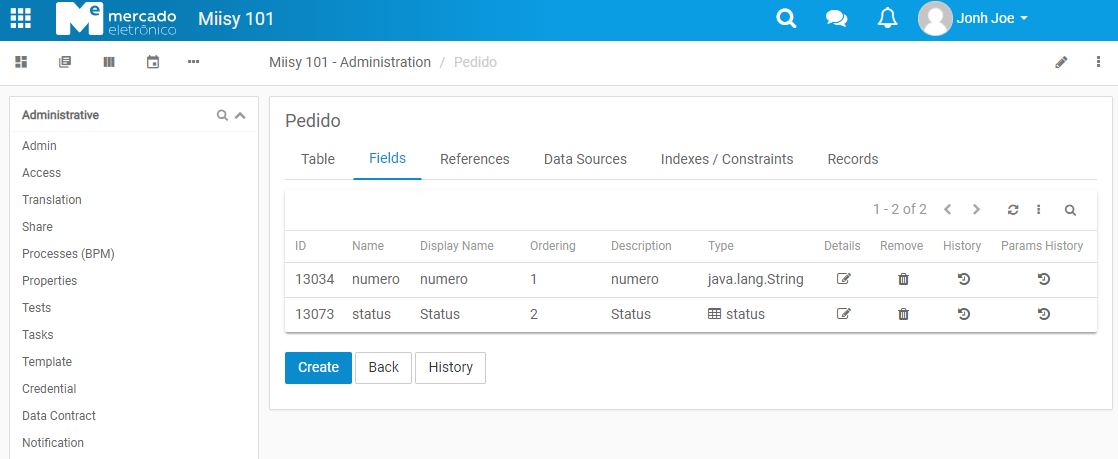
Pedido
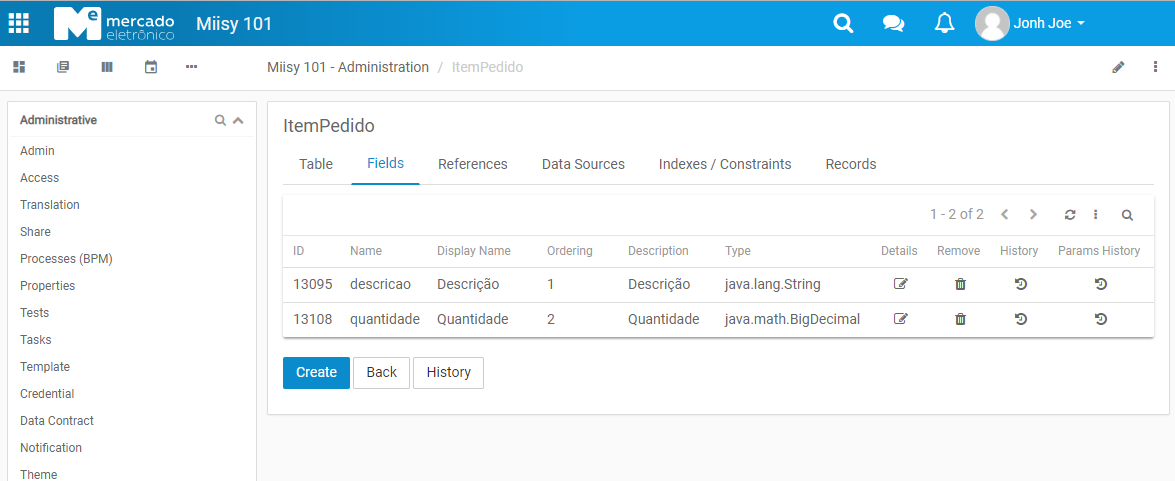
Item Pedido
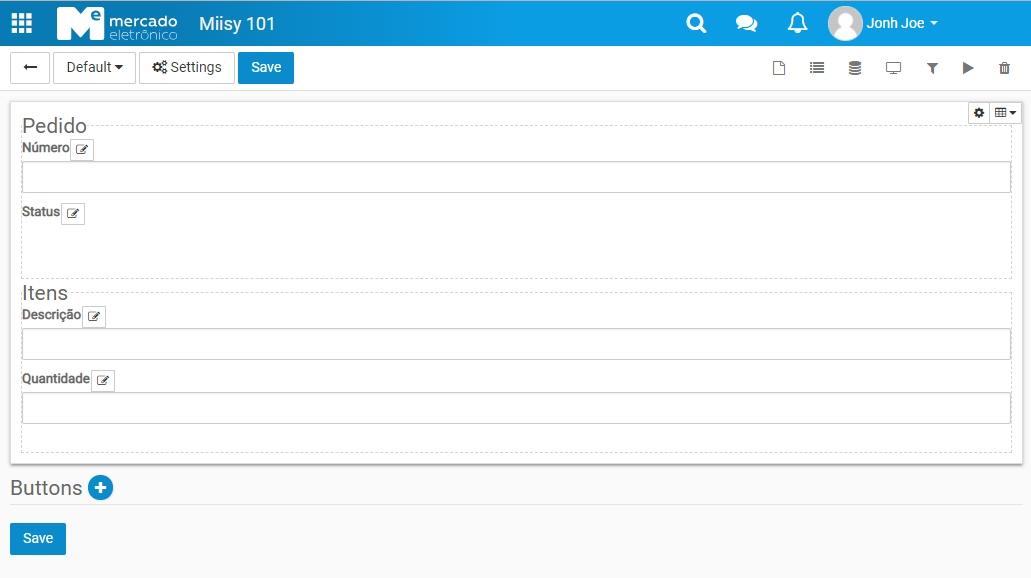
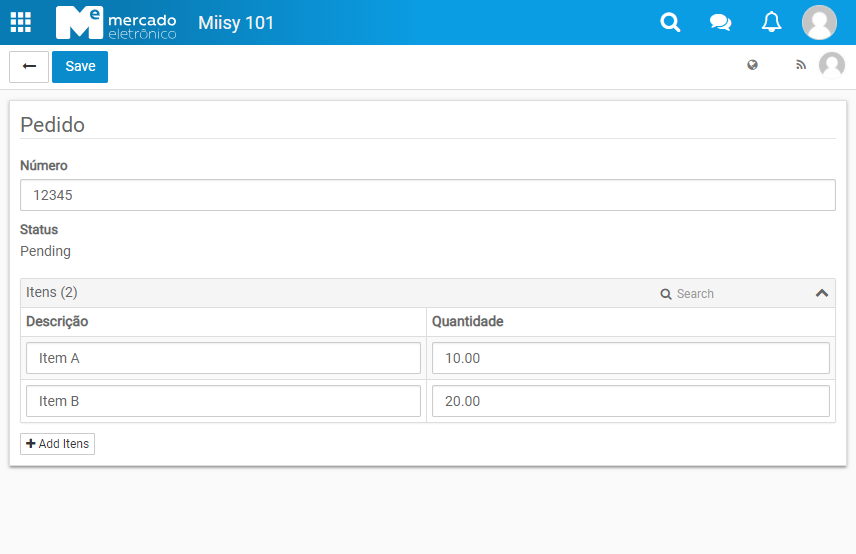
And the follow screens for the Document Pedido:
Default Screen
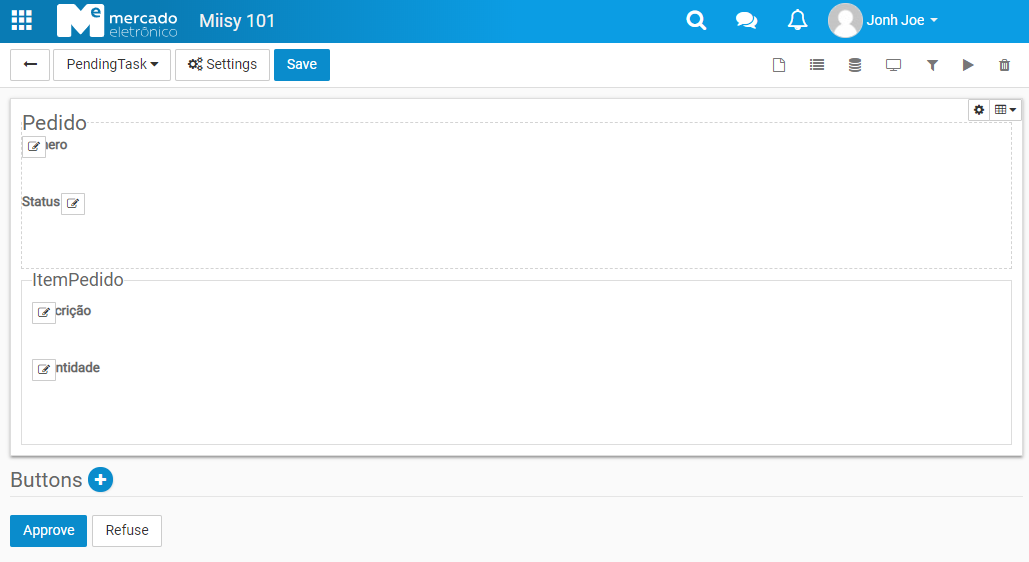
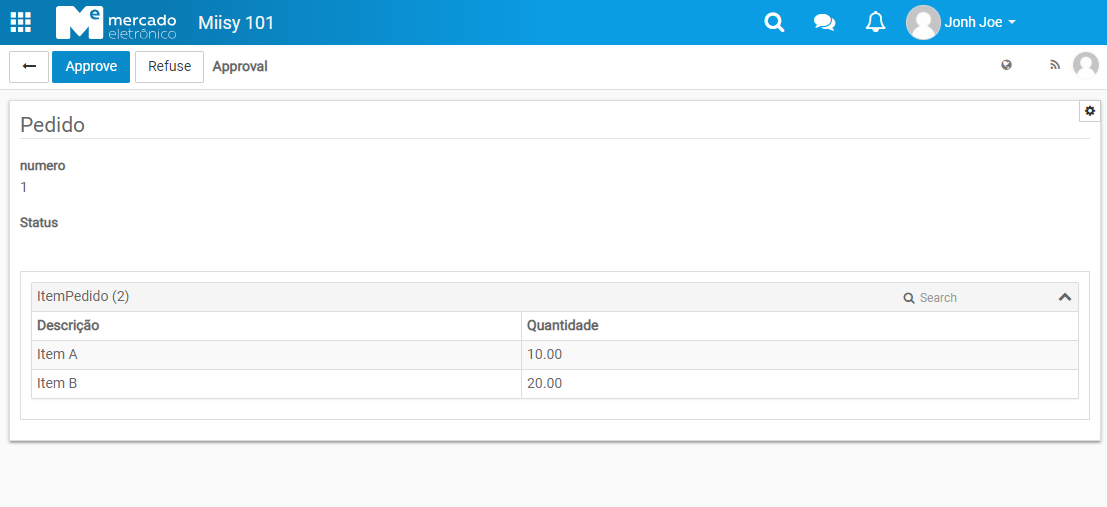
PendingTask Screen
All fields, read-only screen with Approve and Refuse buttons.
Macros
We'll create macros to change the document status.
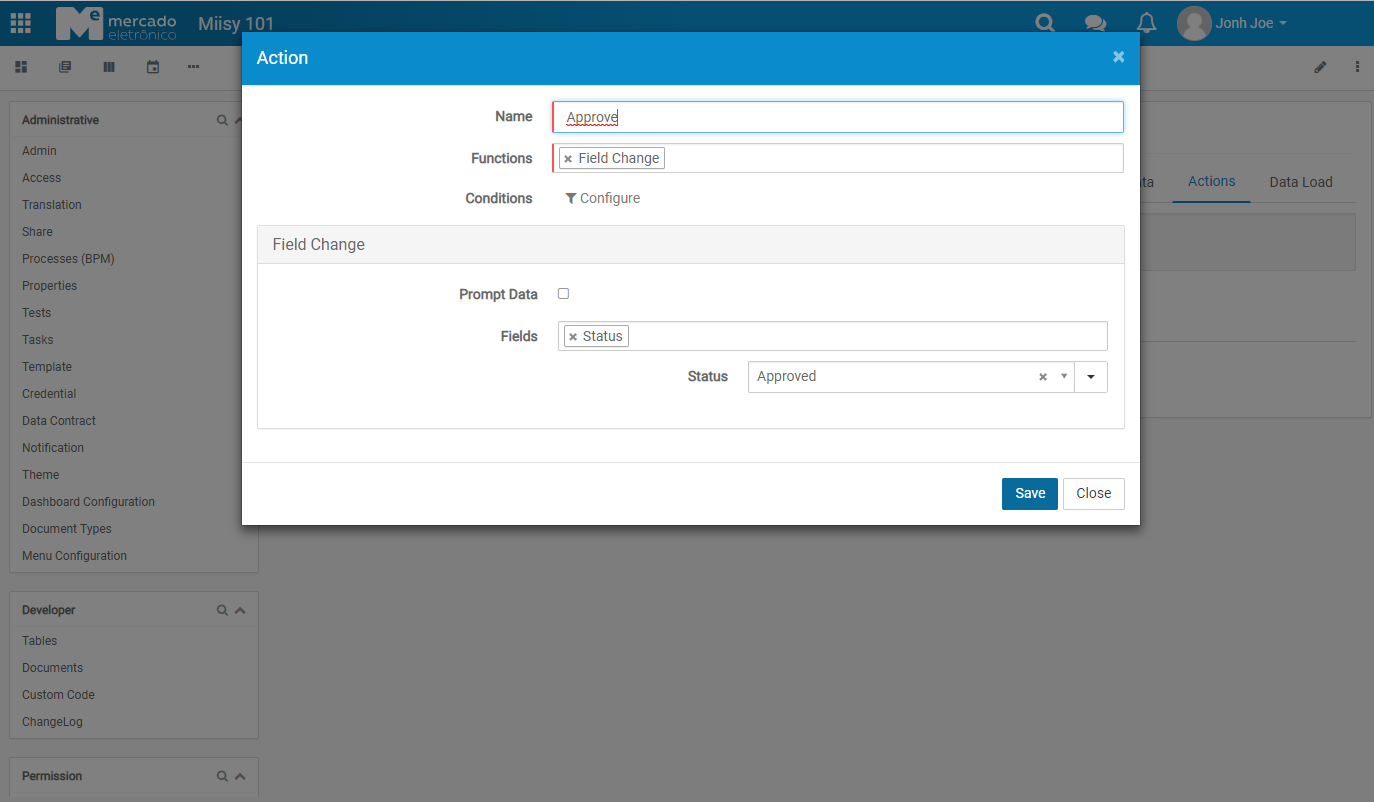
Approve
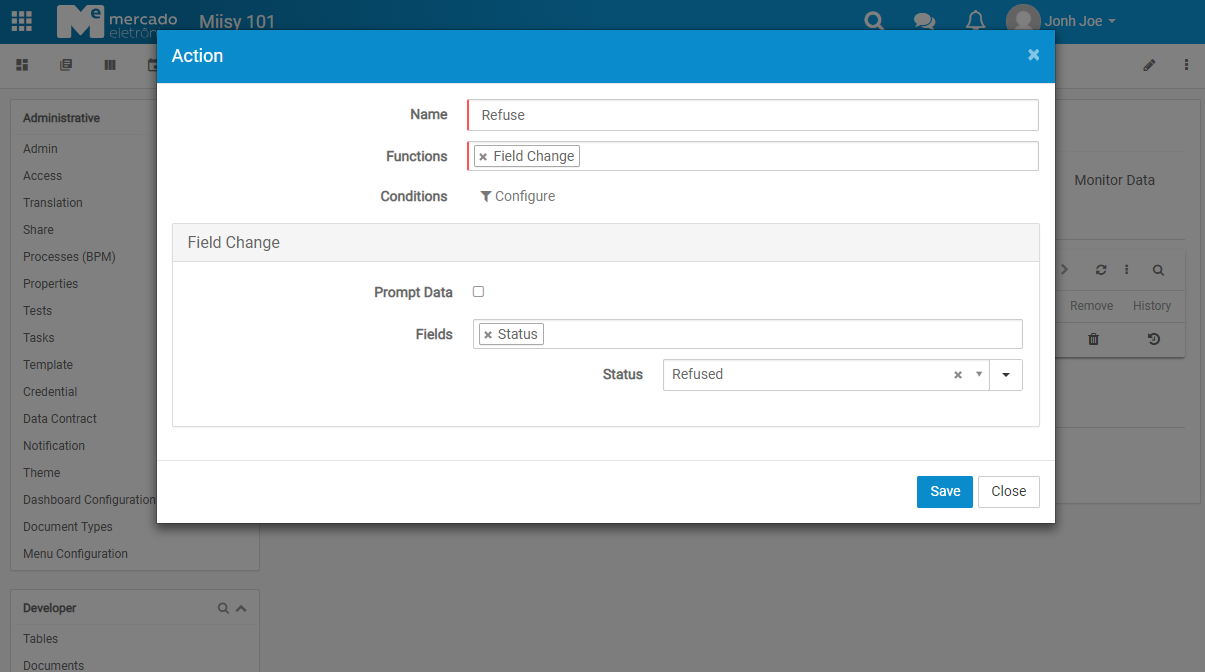
Refuse
Web Modeler
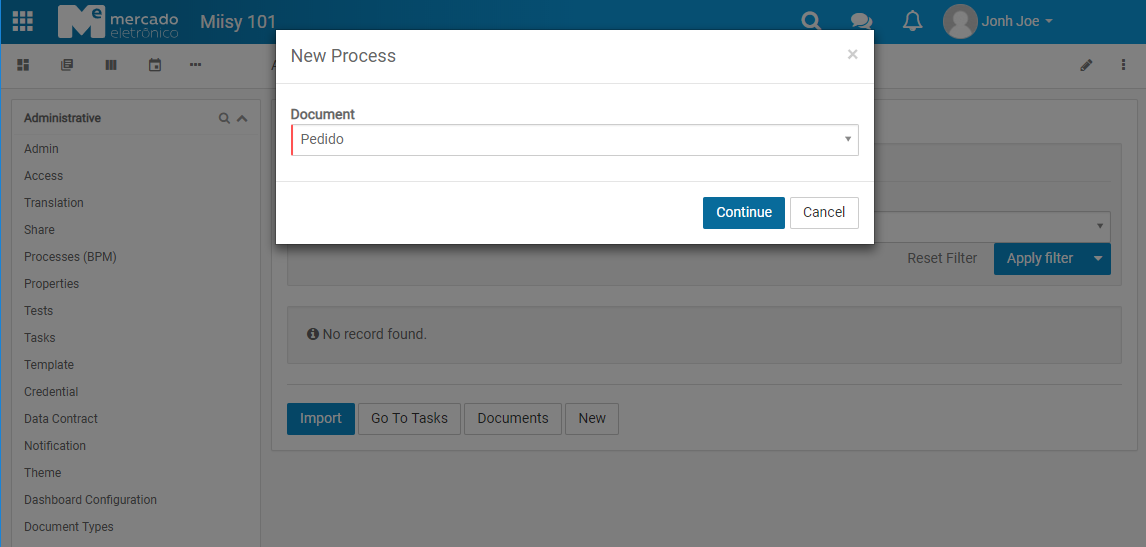
To open the Bpmn Web Modeler go to Configuration -> Processes (BPM) and click on New. Here you can open a local process file, create a new process (clean the model), save the process to local file, deploy the process do MECEAP.
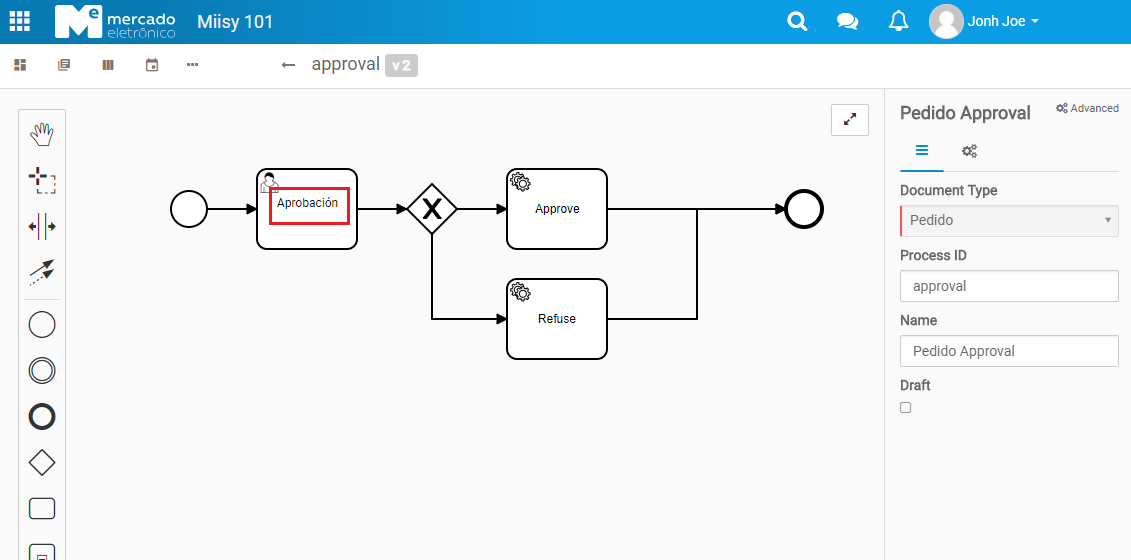
Modeling the Process
Create the process as shown in the image. The sequence flow of the Process will be:
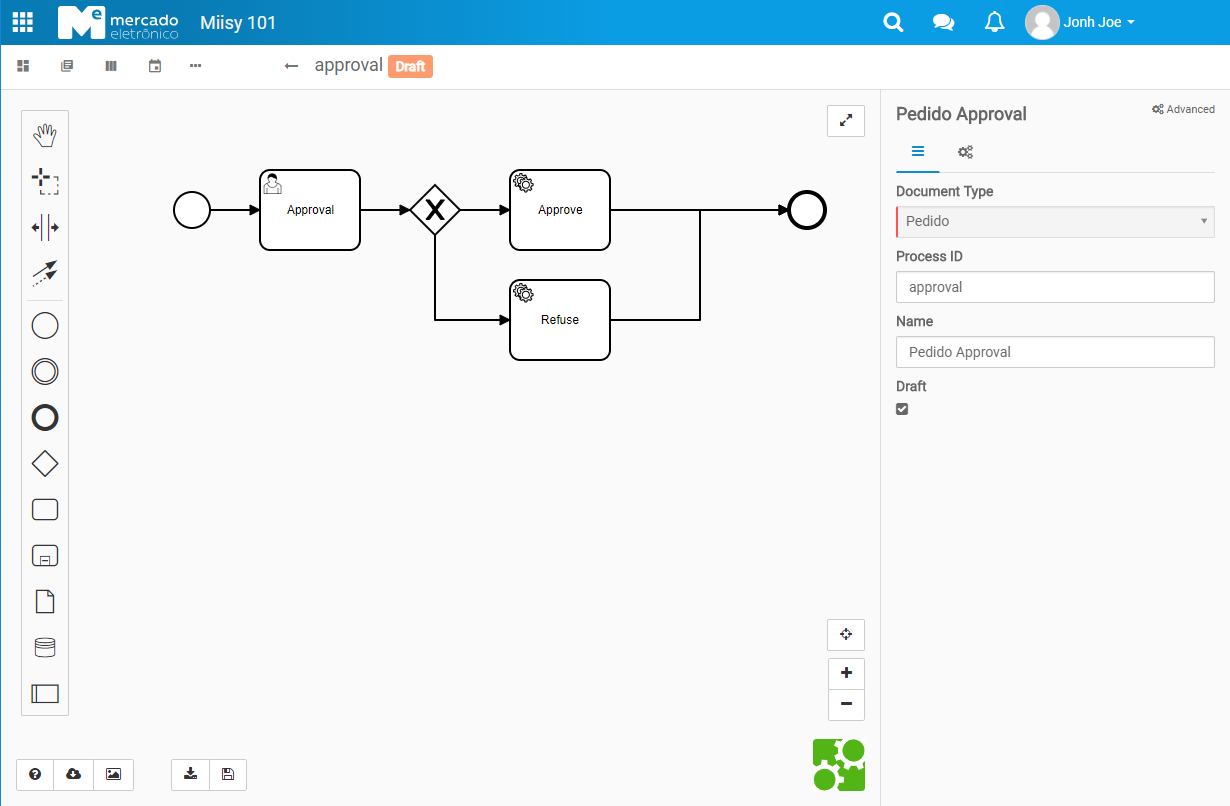
Configuring the Process
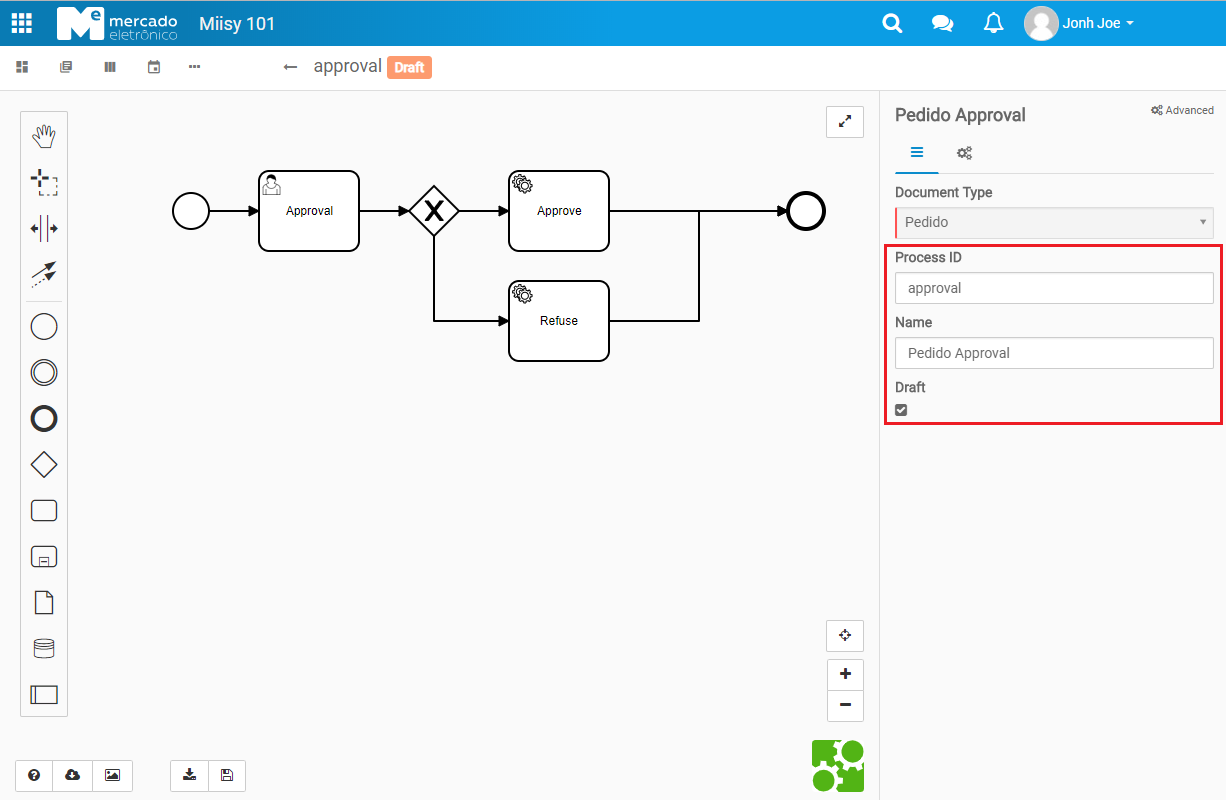
Main Configuration
- Id: this is the key of the process, it's unique for all CustomRoot
- Name: description of the process
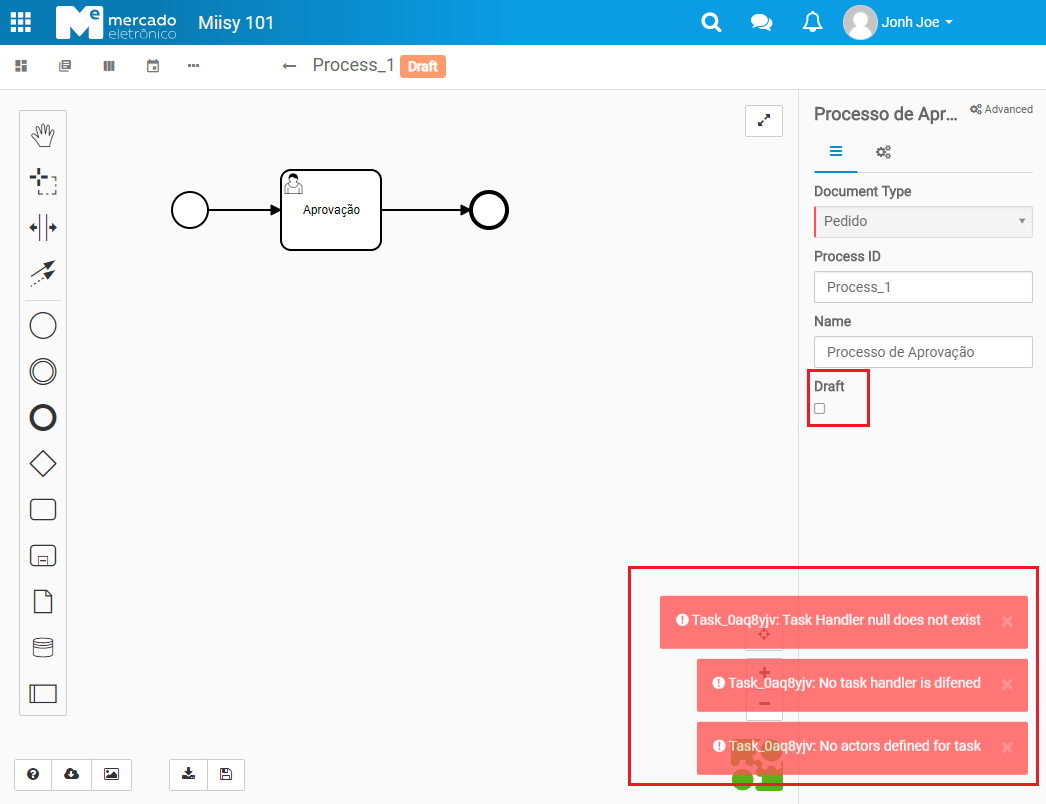
- Draft: To avoid the process validation.
Approval Task
A User Task means that this part of the process will interact with a human being, otherwise, the process stops on a user task until a human being complete the task, many users can be configured to complete the task but just one will really complete it.
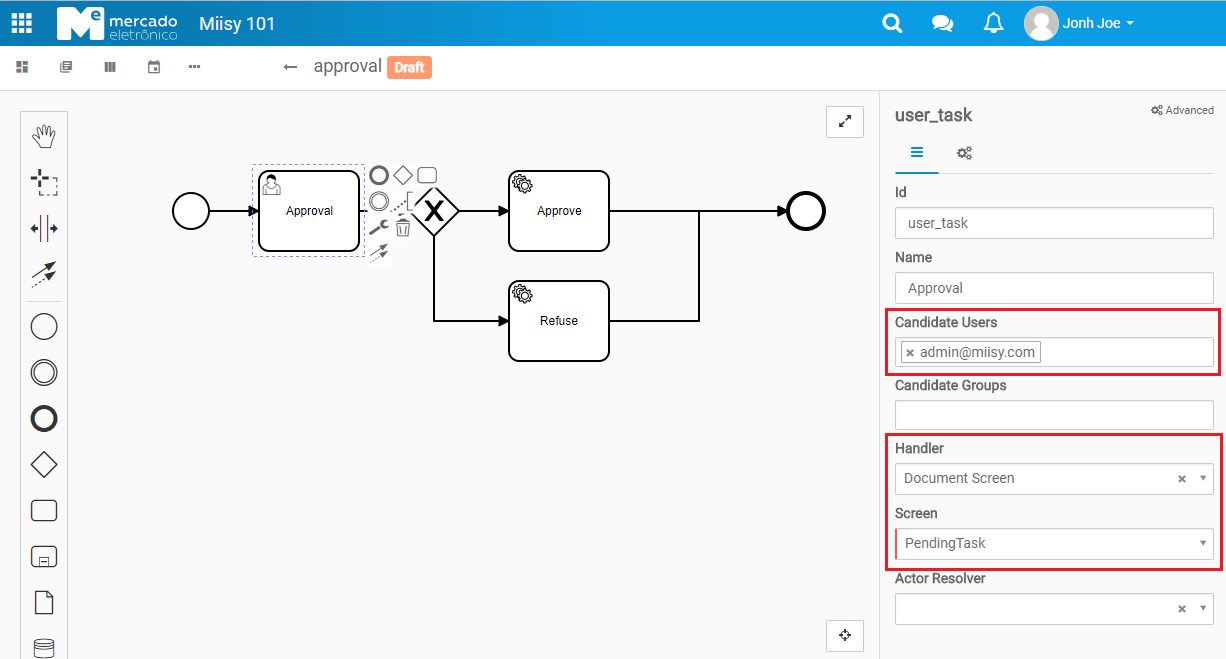
- Candidate Users: A list of e-mail users separated by , (comma), set admin@misy.com
- Handler: A class that will be executed when the user clicks to see the Task, choose Document Screen, the class that will redirect the user to an specific Screen
- Screen: The screen that user will be redirect, choose PendingTask
Exclusive Gateway
An exclusive gateway is a decision, all outgoing sequences will be evaluated and the first to returns true will be followed by the process, to configure the expression click on each outgoing sequence flow. In our case we have a path to approve and a refuse way.
In the expression you can use any process variables ( you can see them in process instance history), when users click on screen actions a variable actionName is included in the process instance with the Action Name configured in the screen as the value. For example, at this stage of the process a variable actionName exists with the value approved or refused.
For approve sequence we'll use:
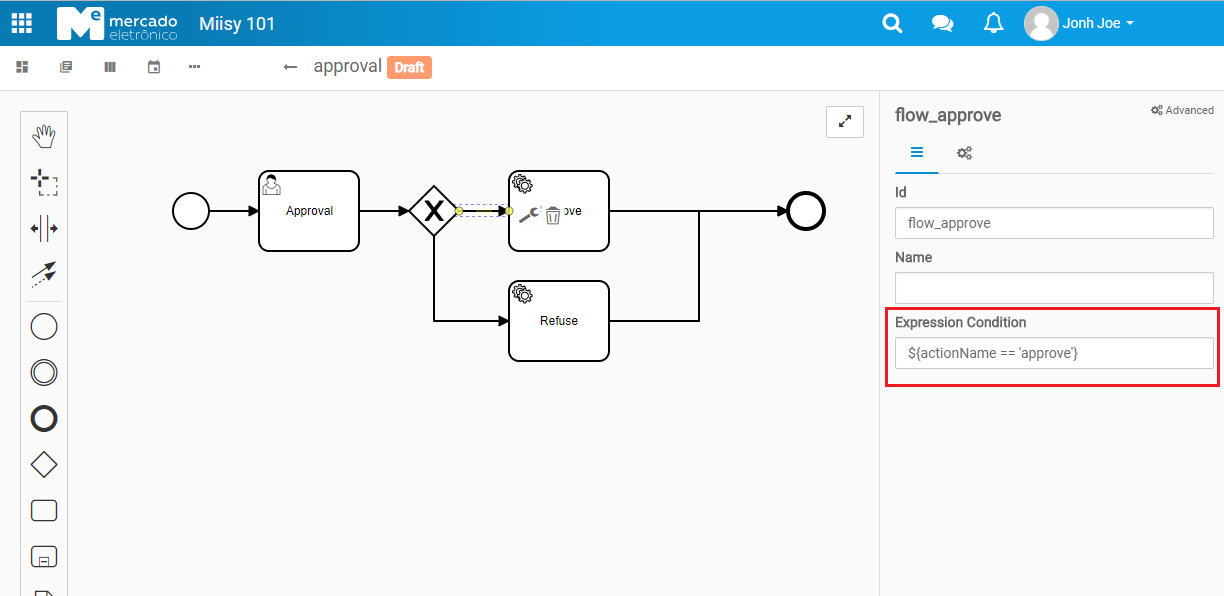
- Expression: Expression to be evaluated, it must return a boolean (true or false), set ${actionName == 'approve'}
For refuse sequence we'll use:
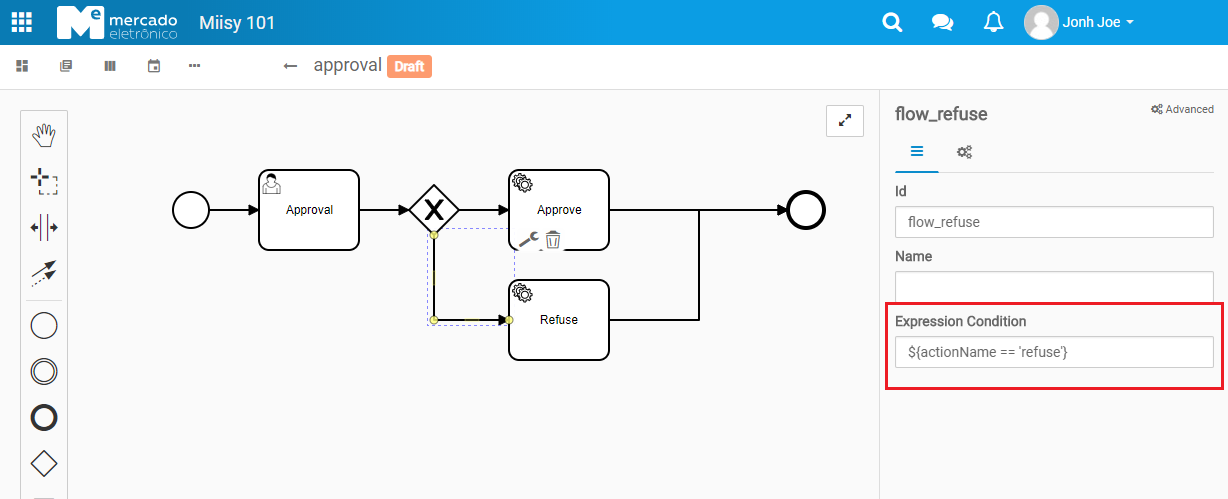
- Expression: Set ${actionName == 'refuse'}
Approve Task
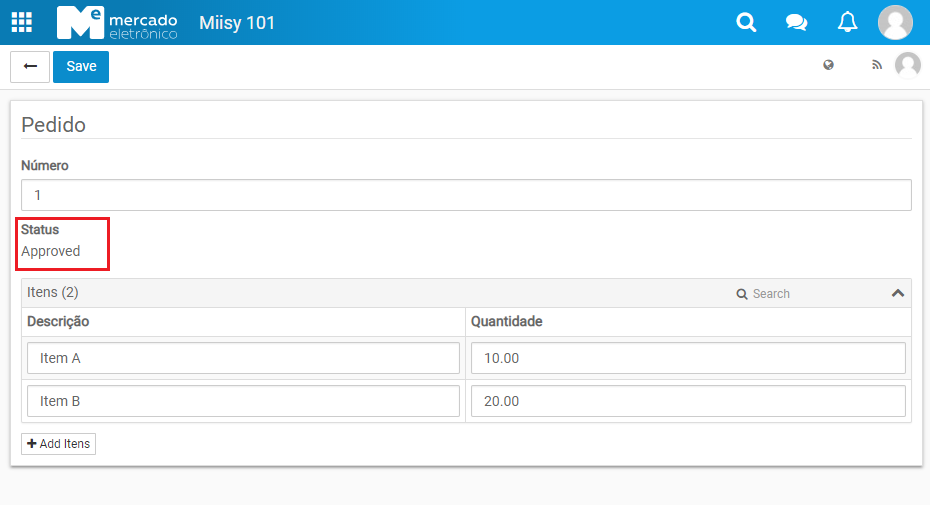
A Service Task can execute any Macro in the Custom Root, this task will change the status of the Pedido document to Approved:

- Handler: The name of the class to be executed, choose Macro Execution, the class that executes macros
- Actions: The macro that should be executed, choose Approve.
Refuse Task
This task will change the status of the Pedido document to Refused:
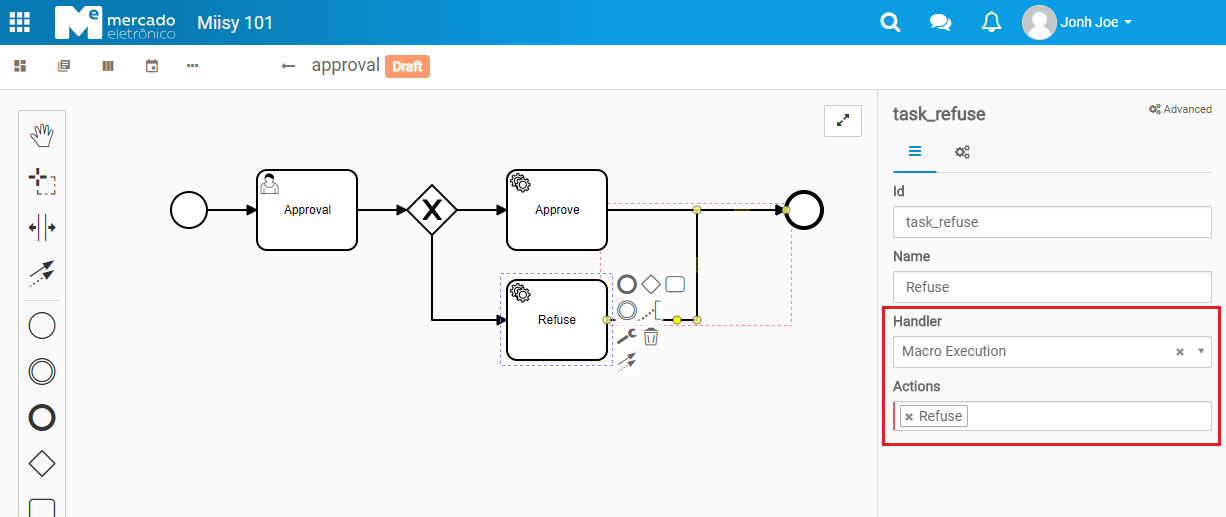
- Handler: Choose Macro Execution
- Actions: Choose Refuse
Process Deployment
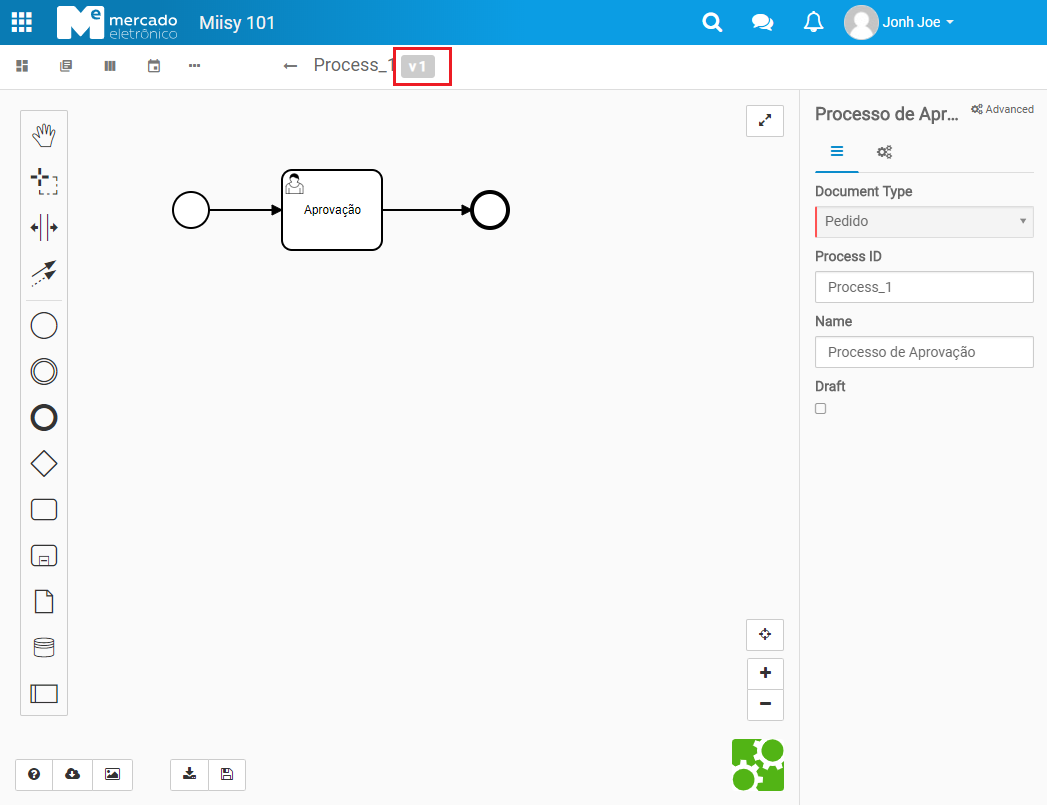
Now you can deploy your process, all basic configurations will be validated before saving it.
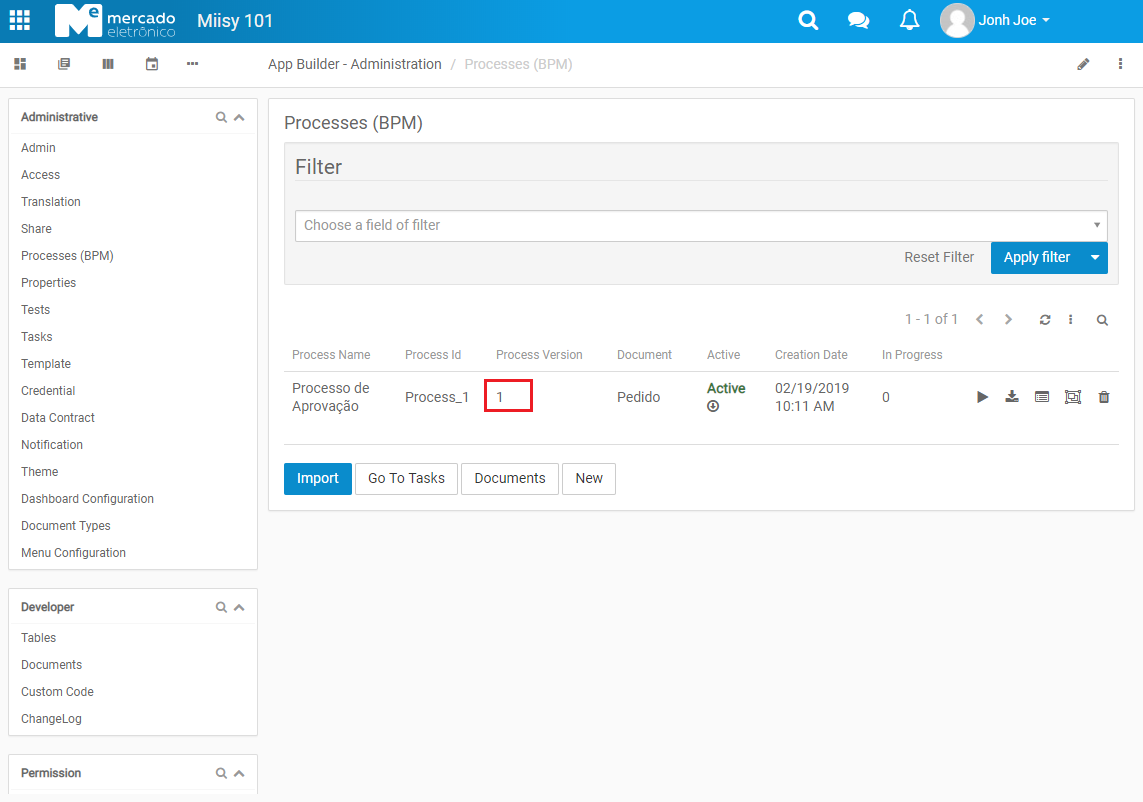
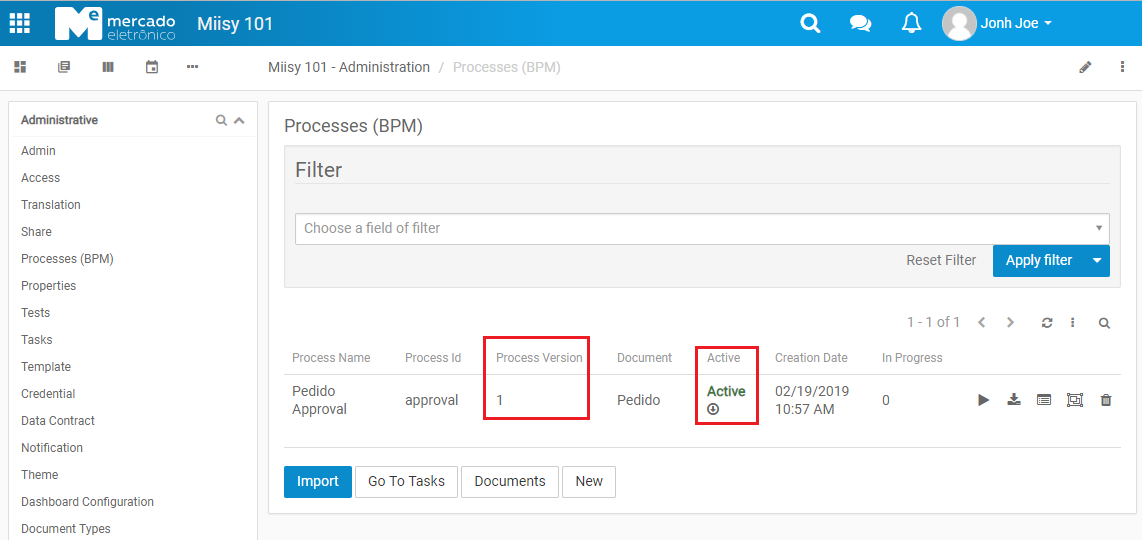
The processes will receive a Version according to the last Process deployed with the same Process Id, this version will become active and the existing one will be deactivated, only one process with same Process Id can be active.
Just the new process instances will use the new deployed Process, the existing process instances will continue with the old Process. When a process instance is created it uses the active Process which is not necessary the last deployed process.
Starting the process
You can start a process directly from the Processes (BPMN) page, in this case a new blank document is created and included into the process instance, if you have required fields and execute a macro in the first task you'll have a problem because the blank document. You can also start a process through a macro in the screen action, we're going to use this way.
Create a macro
Create a macro Start Process to start the process.
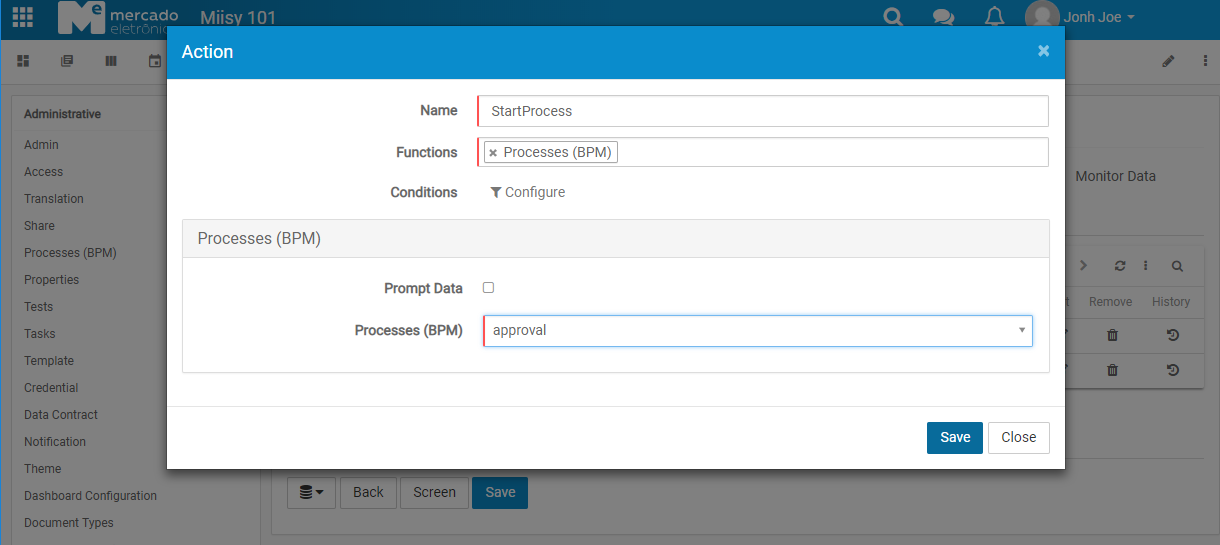
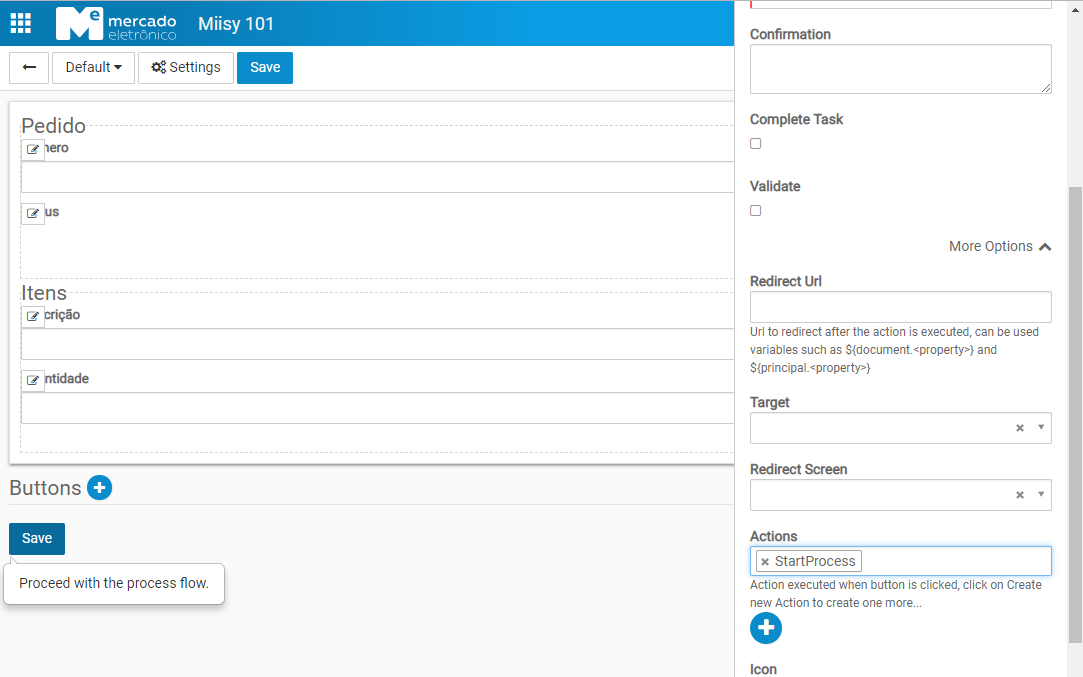
Change de action of Default screen to start the process:
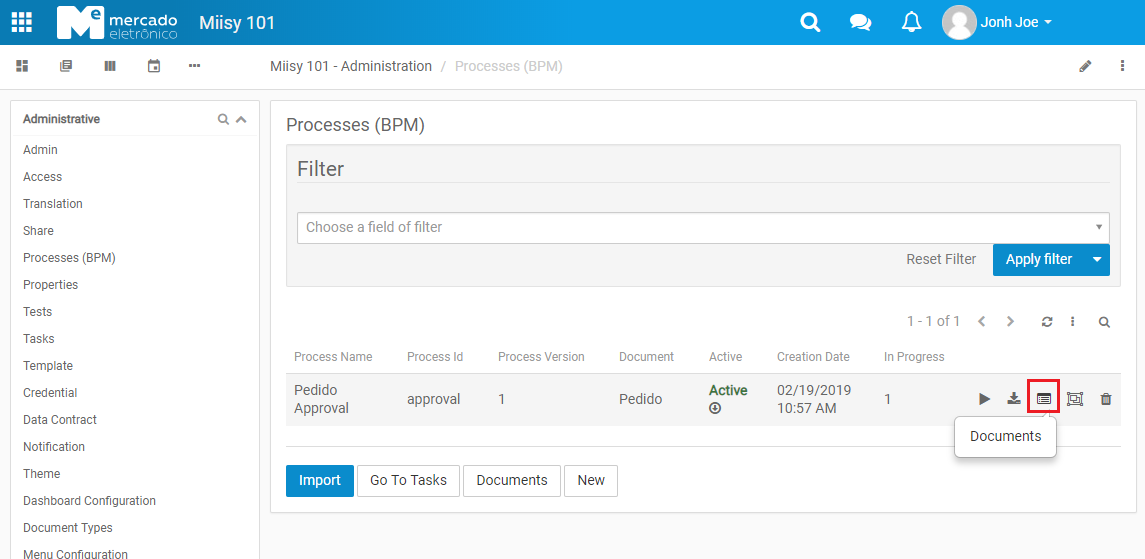
Starting process
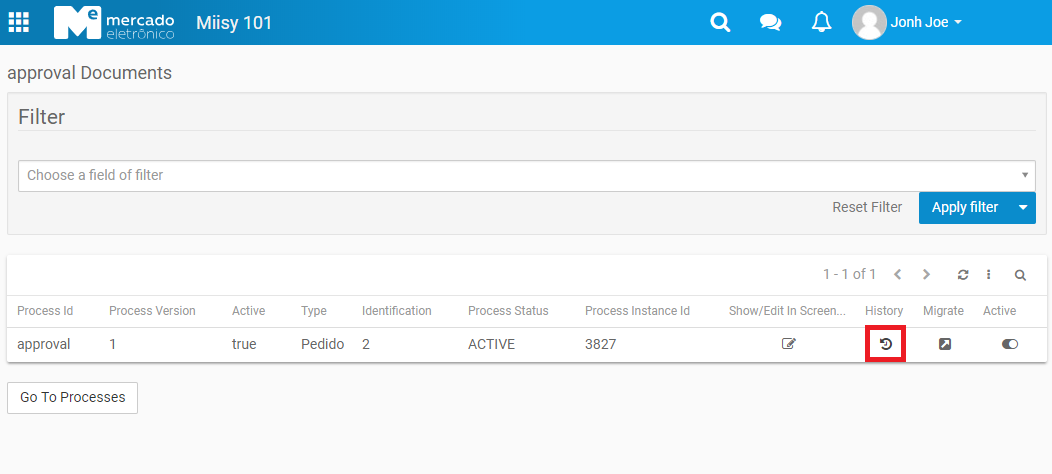
Now the process is started, you can see the process instance on Processes (BPMN) page and clicking on Approval process documents:
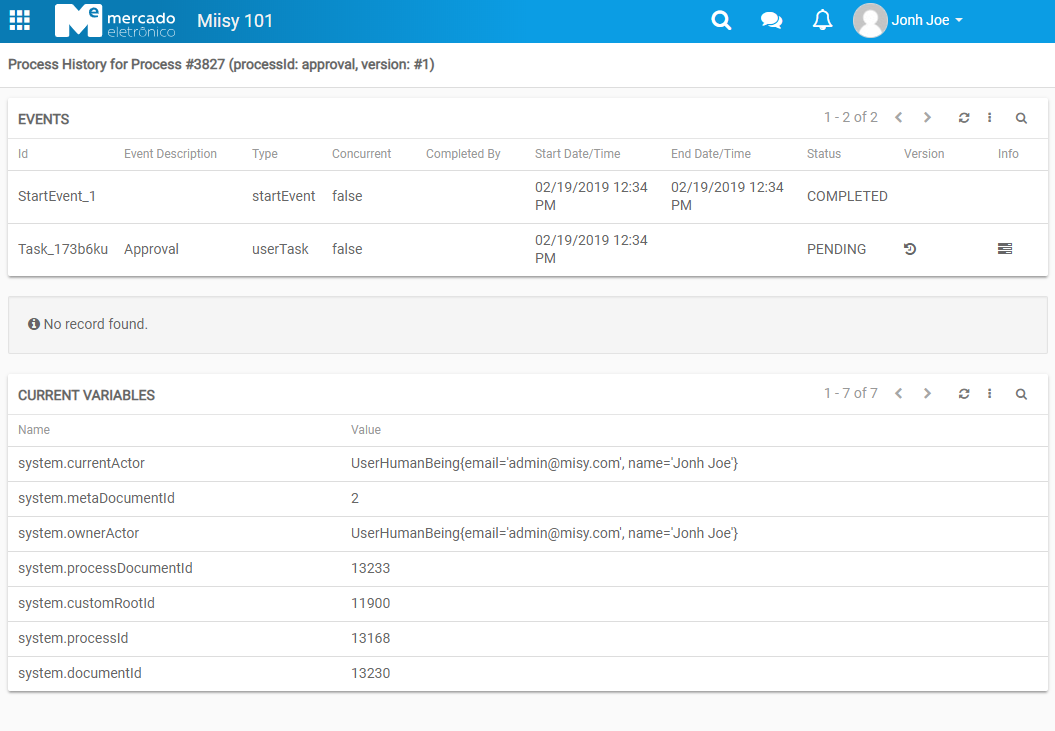
In the process history you can the see the process variables, completed, cancelled and pending tasks, etc. On the link column Version you can see the document at that moment of the process:
Completing the tasks
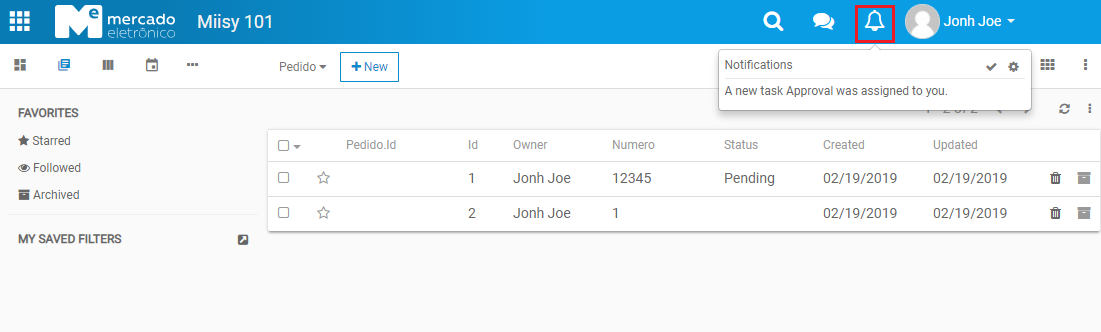
Now if you login with the user for Approval Task (in our example admin@misy.com) you will see a notification about the task:
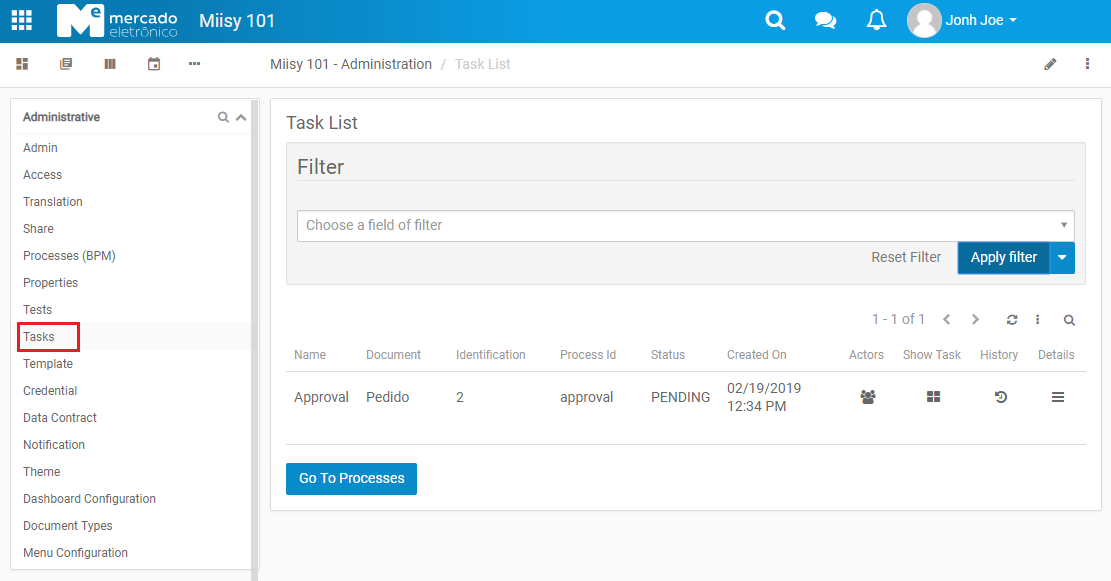
Or you can go in the Tasks page and see all pending tasks for you:
When clicking on the task you will be redirected to the screen configured in the task.:
Now the user can choose between "Approve" and "Refuse", in our example we will approve this Pedido.
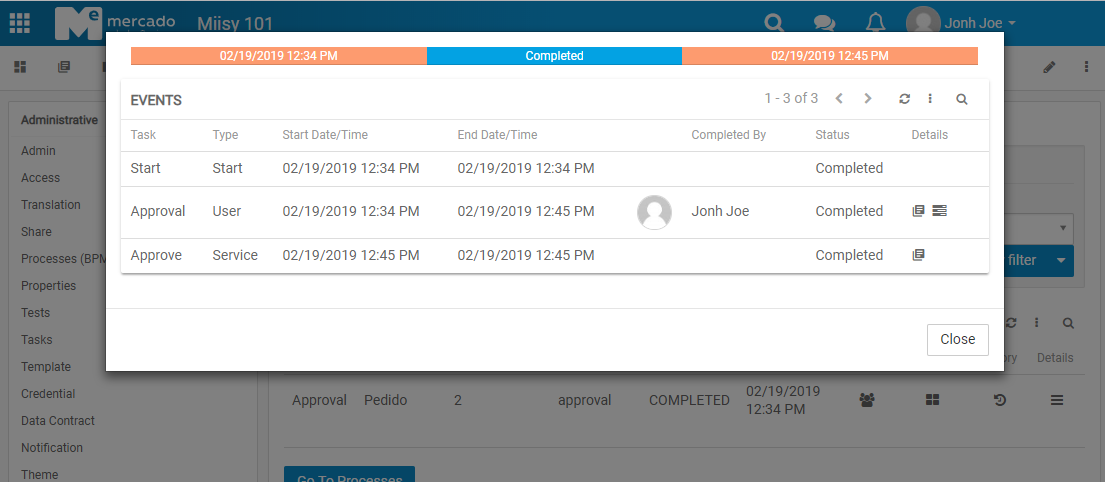
As you can see in the Task List the proccess was completed.

For more Details you can open the history.
Draft Processes
First we need to understand that every bpm process needs to meet some validation requirements in order to get used. Each change is incremented by one version and the documents will be linked to this new version.
When we are developing or adjusting the bpmn we often do not want it to be validated or even made available. For this, the draft option was created, which allows saving a process without generating a new version and also not being validated.
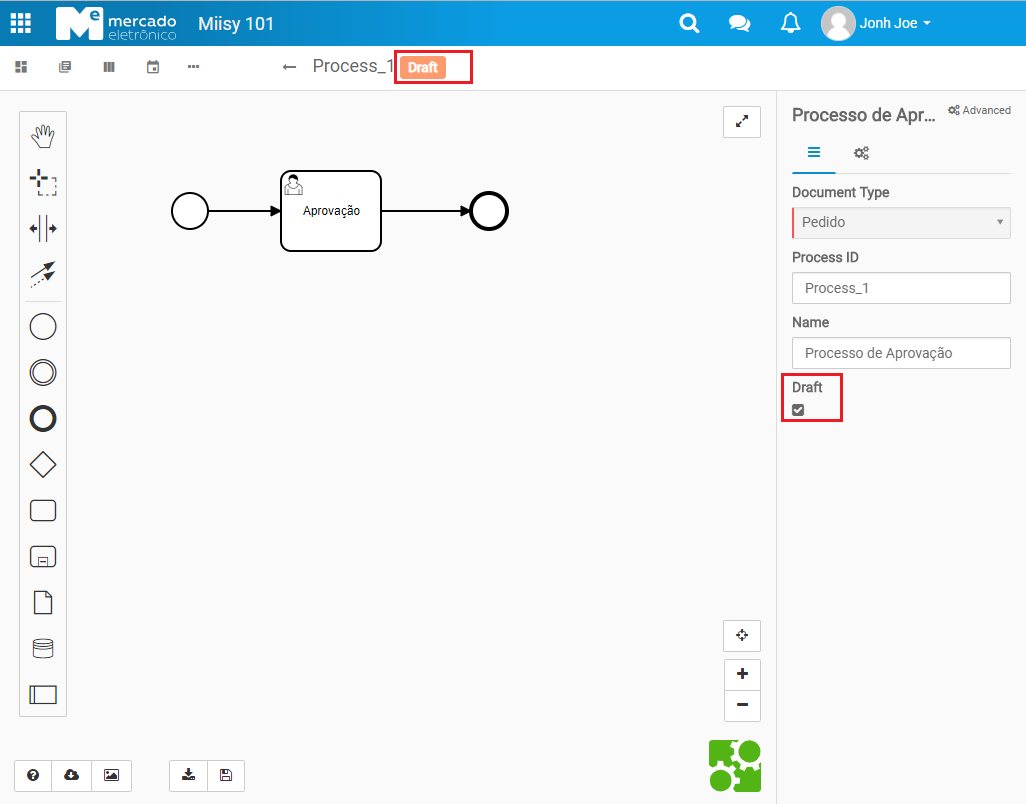
The drafts are shown by the "Draft" label in the active column.

A Draft can be re-versioned and applied to the system only by unchecking the option.
We remind you that it must be validated.
After that, it will be deleted and a new version of the process will be generated.
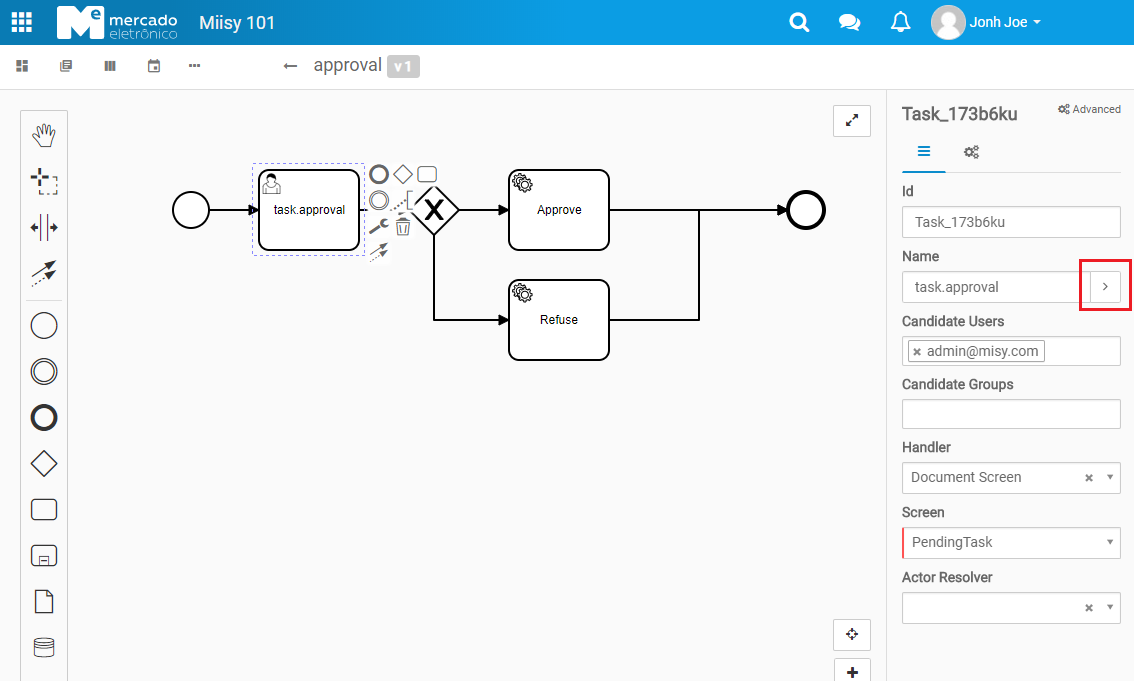
Translating Tasks
In many cases mainly for user tasks we need to translate to the different languages supported by the platform.
To do this, the "Name" field supports "terms" of translation.
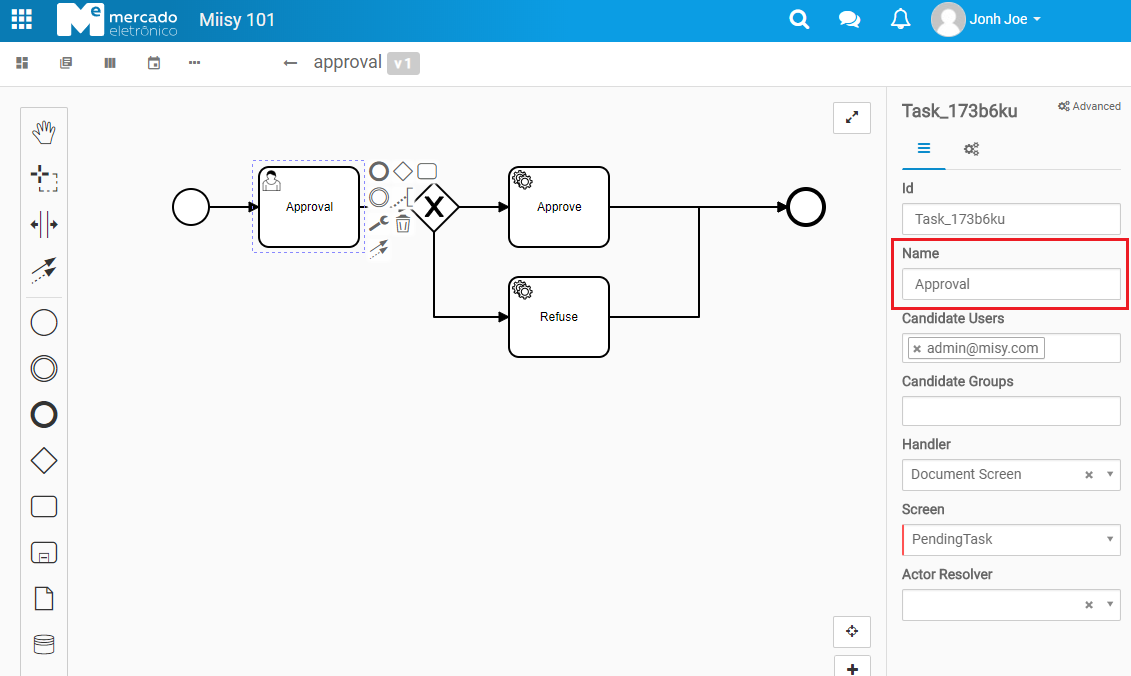
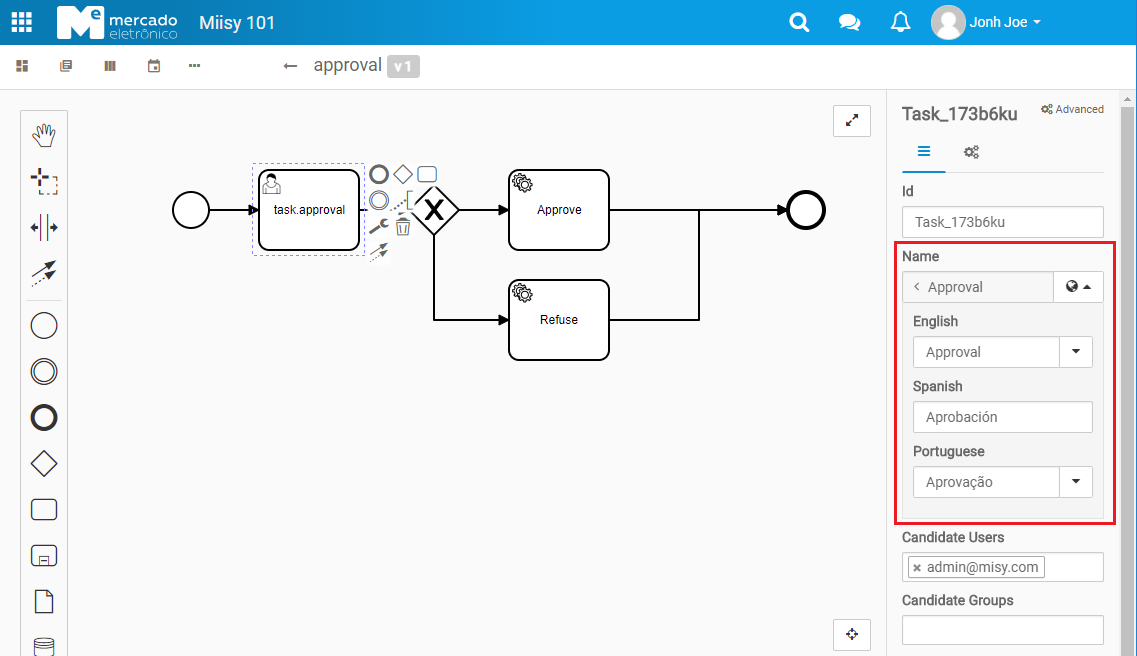
If we put a term inside the "Name" field, the system will automatically understand that the task should be translated and the option to do so appears.
After clicking on the option will be presented the translation component used by the platform in several points.
To test, we only need to change the language used.
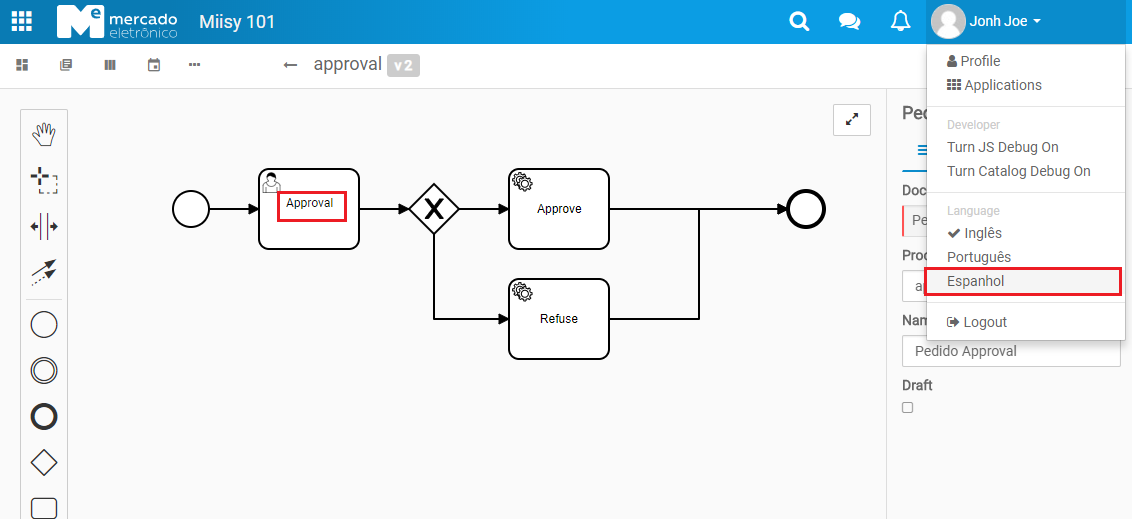
As you can see the task has been translated to "Aprobación".